

Results 31 to 40 of 119
Thread: 737-800 Build in Oslo
-
10-19-2010, 09:06 AM #31300+ Forum Addict


- Join Date
- Oct 2008
- Location
- Oslo
- Posts
- 316
Re: 737-800 Build in Oslo
More toys arrived today. Ill get back with more when building this linked setup starts.
.
.
.
.
.
-
10-19-2010, 10:10 AM #32Warren

- Join Date
- Dec 2008
- Location
- Dupont, WA
- Posts
- 488
Re: 737-800 Build in Oslo
Nice... Nax, that is awesome!
-
10-19-2010, 11:15 AM #33300+ Forum Addict
- Join Date
- Oct 2008
- Location
- Oslo
- Posts
- 316
Re: 737-800 Build in Oslo
They're gonna' be awsome anyway
 As I see it, the adaption to FSX will be no problem. Looking sooo forward to start the work.
-
10-19-2010, 11:17 AM #34500+ This must be a daytime job

- Join Date
- Jun 2009
- Location
- Athens
- Posts
- 720
Re: 737-800 Build in Oslo
Wowwwww that's fantastic !!!!
Keep us posted
-
10-19-2010, 12:10 PM #3575+ Posting Member
- Join Date
- Jun 2010
- Location
- Colorado
- Posts
- 131
Re: 737-800 Build in Oslo
Nice, if you have a plan, great. If you're looking for ideas, options, pitfalls or some info on control loading, give a holler.
Been there, done it....
-
10-19-2010, 02:16 PM #36300+ Forum Addict
- Join Date
- Oct 2008
- Location
- Oslo
- Posts
- 316
Re: 737-800 Build in Oslo
Holy cr**!! That setup needs a explanation.
Do you have a post or a website with some pics and in writing what you've done?
I have now had a good look at the mechanics on one of the yokes, and a plan is slowly starting to form, but in my head it looks "kinda' different" from what you show here.
I guess you have added some cool features with all those chains ++ so please let me know what you have done here.
-
10-19-2010, 06:48 PM #37300+ Forum Addict

- Join Date
- Aug 2008
- Location
- São Paulo, Brazil, Brazil
- Posts
- 306
Re: 737-800 Build in Oslo
Excelent parts and job!! Congrats!!
-
10-19-2010, 07:48 PM #3875+ Posting Member
- Join Date
- Jun 2010
- Location
- Colorado
- Posts
- 131
Re: 737-800 Build in Oslo
Okay, I can do that.
There is no website, but give me a few days to round up some pics and I'll explain the setup as well as the control loading. We did this a few years back and will have to dig around to find more pics.
JW
-
10-21-2010, 12:34 AM #3975+ Posting Member
- Join Date
- Jun 2010
- Location
- Colorado
- Posts
- 131
Re: 737-800 Build in Oslo
as per the request from nax, here is some more info on the setup
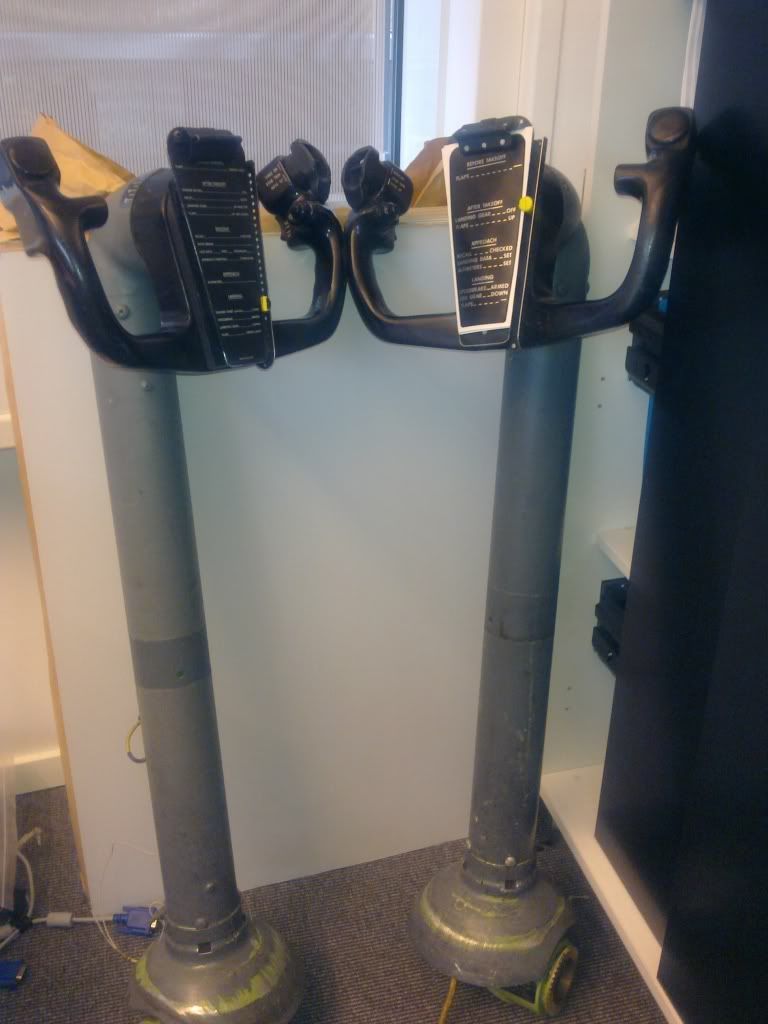
175_7501.jpg
Here is a pic of the captain's side with the floor boards removed. One constraint was to keep the floor height to a minimum. so we have about 10" (25.4cm) to work with from the slab to the cabin floor. Another constraint was the height of the lever arm to the actuator, but we'll cover that later when discussing the control loading and autopilot
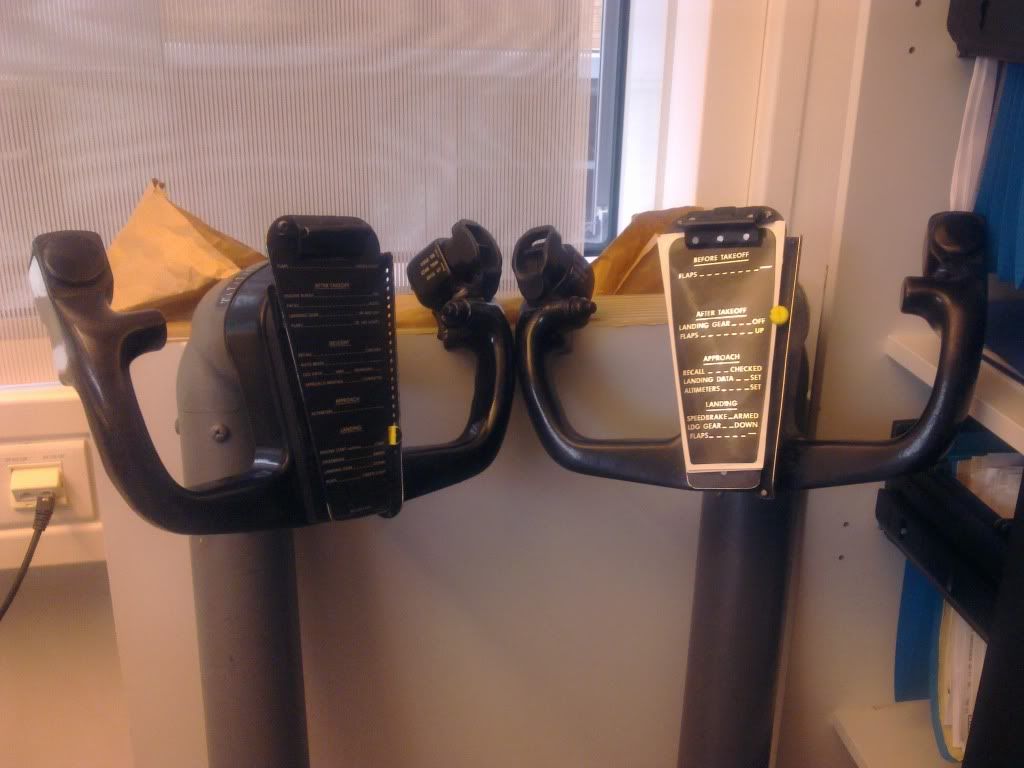
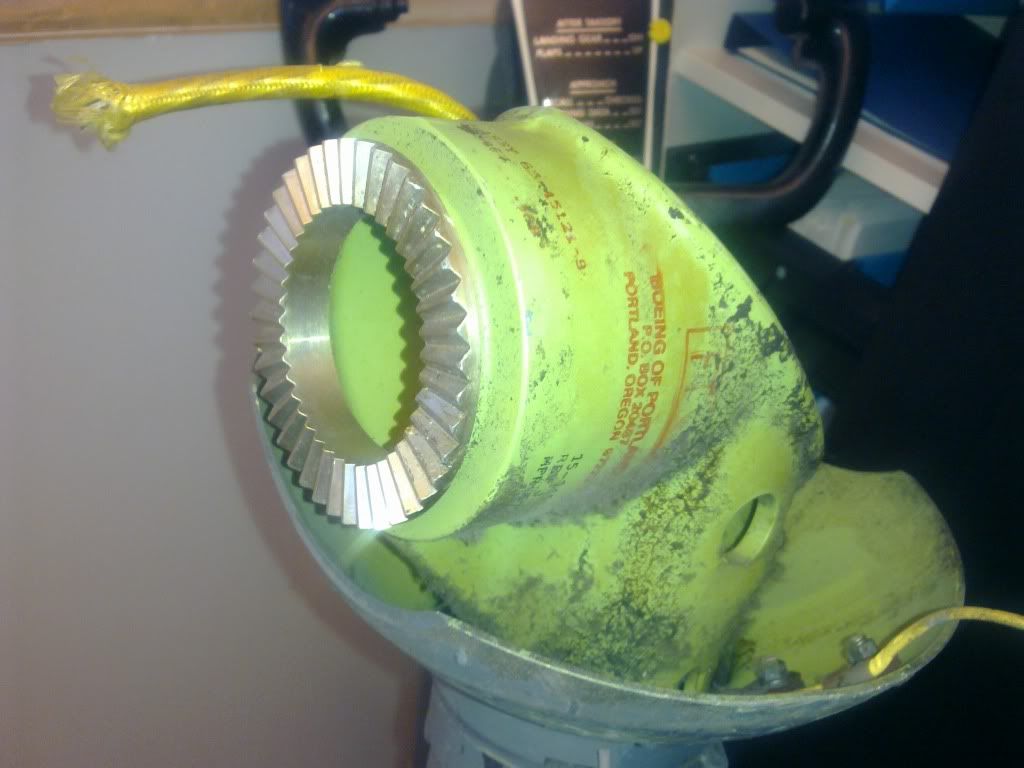
175_7504.jpg
This is a closeup of the connection with the top of the cradle support removed
We machined a toothed piece, the silver colored disc, to mate with the column and it acts as the load bearing part that fits into the cradle. You need the pressure C clamp to draw the pieces together. A large hollow tube was welded to the piece and a similar arrangement was done on the copilot's side to interconnect the columns. You need to be careful here to make certain each piece is correctly welded as to rotational position, otherwise your columns will be misaligned in the vertical. Easiest way to do that, simply attach the machined parts to each of the columns, insert the tube in each end, lay the assembly on the shop floor, brace as desired, and weld away.
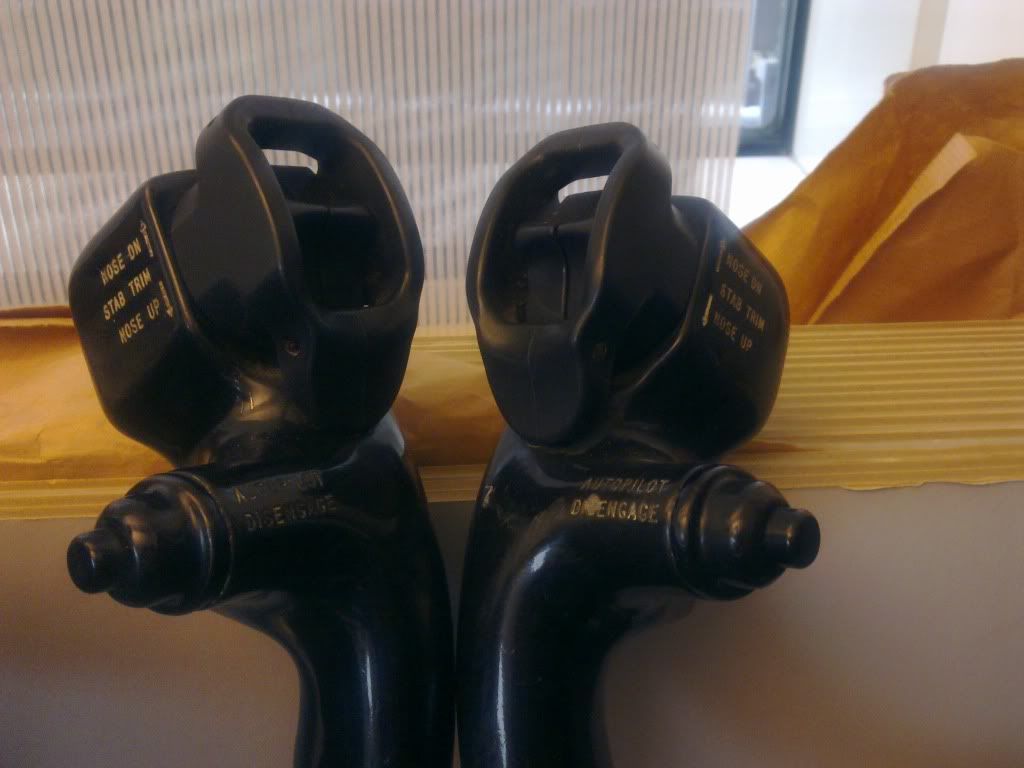
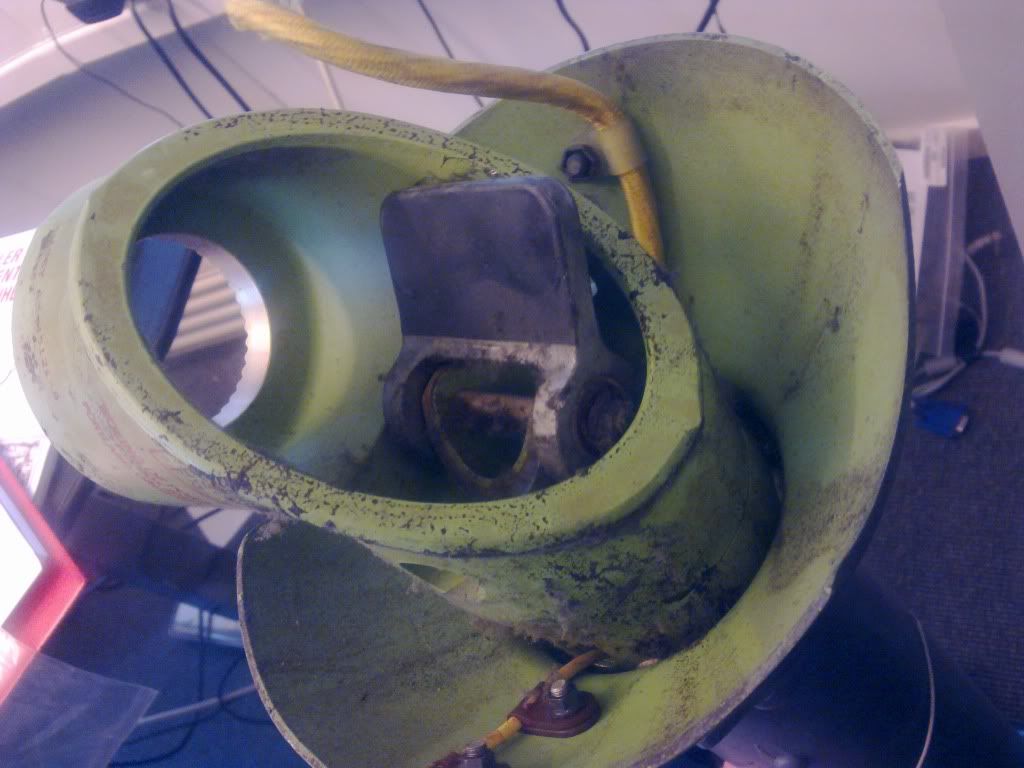
175_7502.jpg
This is the rotary pot to provide column position. It is a high precision pot (20K) and requires 3 rotations for full scale. Would have preferred a complete rotary connection to the tube to provide a linear scale end-to-end. Using the lever arm was a compromise and works reasonably well. The largest non-linearity occurs with the column full aft. If you ever get there this is the least of your problems
The pot is connected to a high res a2d converter that provides 12 bits of accuracy and provides 100,000 samples per second for up to eight channels. The gearing ratio to the pot provides a column resolution of 0.02 degrees per bit. Why 12 bits and the high sampling rate?? You'll need that when it comes time for designing and operating the PID controller to do control loading as well as moving the controls in response to A/P commands....
Next report will cover the roll axis, this is a bit more complicated.... stay tuned
JW
-
Post Thanks / Like - 1 Thanks, 0 Likes, 0 Dislikes
 nax228 thanked for this post
-
11-14-2010, 01:08 PM #40300+ Forum Addict
- Join Date
- Oct 2008
- Location
- Oslo
- Posts
- 316
Re: 737-800 Build in Oslo
Hola!
Long time since last update, but I have done this and that since last time.
Lately I've been working more om the backlighting. The problem with pulsating LEDs was caused by a poor power source. I have picked up a PC power unit (145W) to run all diodes and the lower EICAS screen that also run on 12V.
To google the leds I have used for MIP and pedestal, go to ebay and search for "Warm White 5M 500CM 3528 SMD LED Strip Light 300 leds". Bought my second roll today and payed 1,25$.
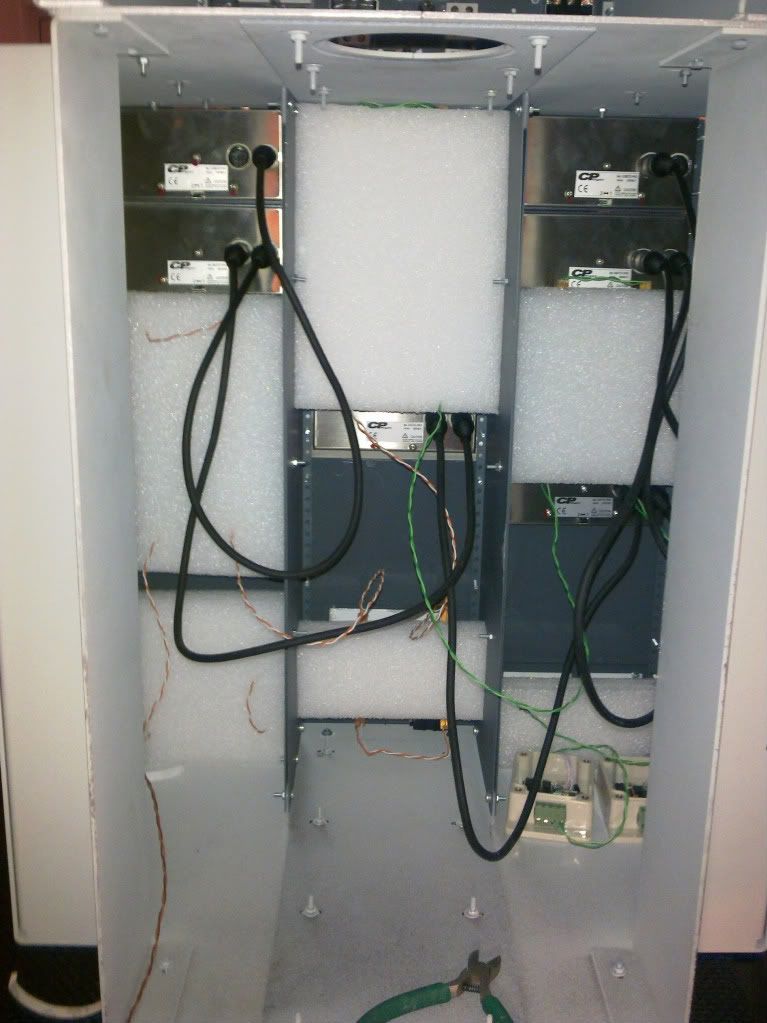
Here is a few pics on how I hooked up the pedestal.
The LED have tape/glue thet stick quite well. I have used some foam thingy that came with my RevSim TQ, and cut those so they fit inbetwen the walls inside pedestal.
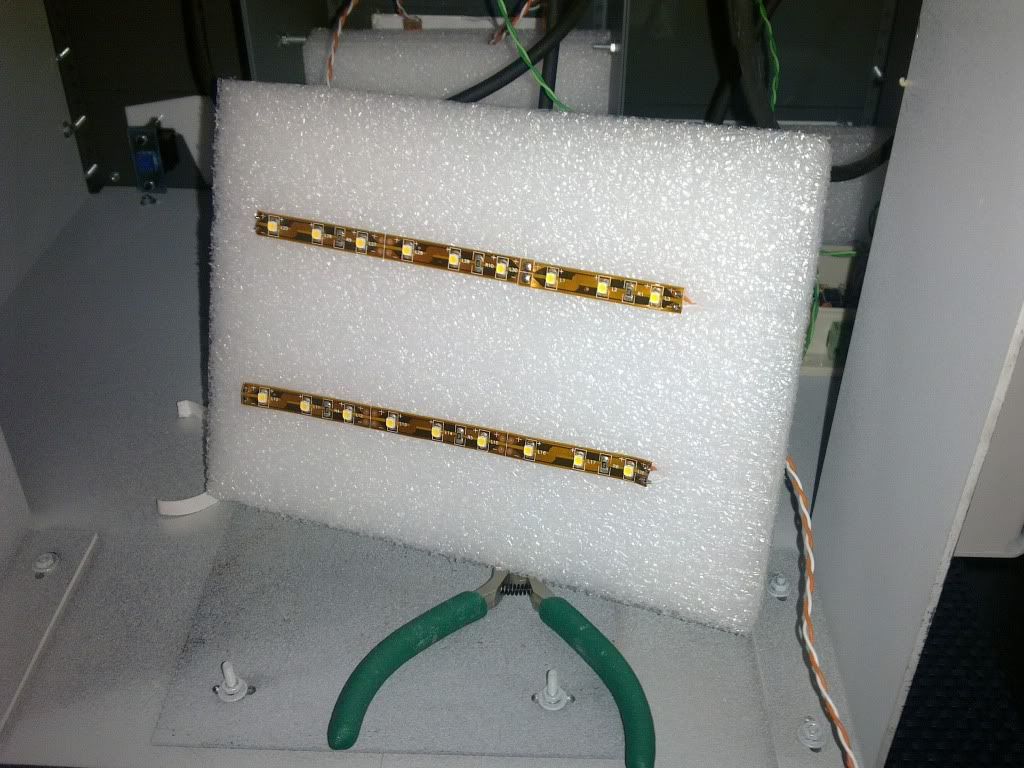
Wires coming out of the back on some panels. Ledstrips won't move.
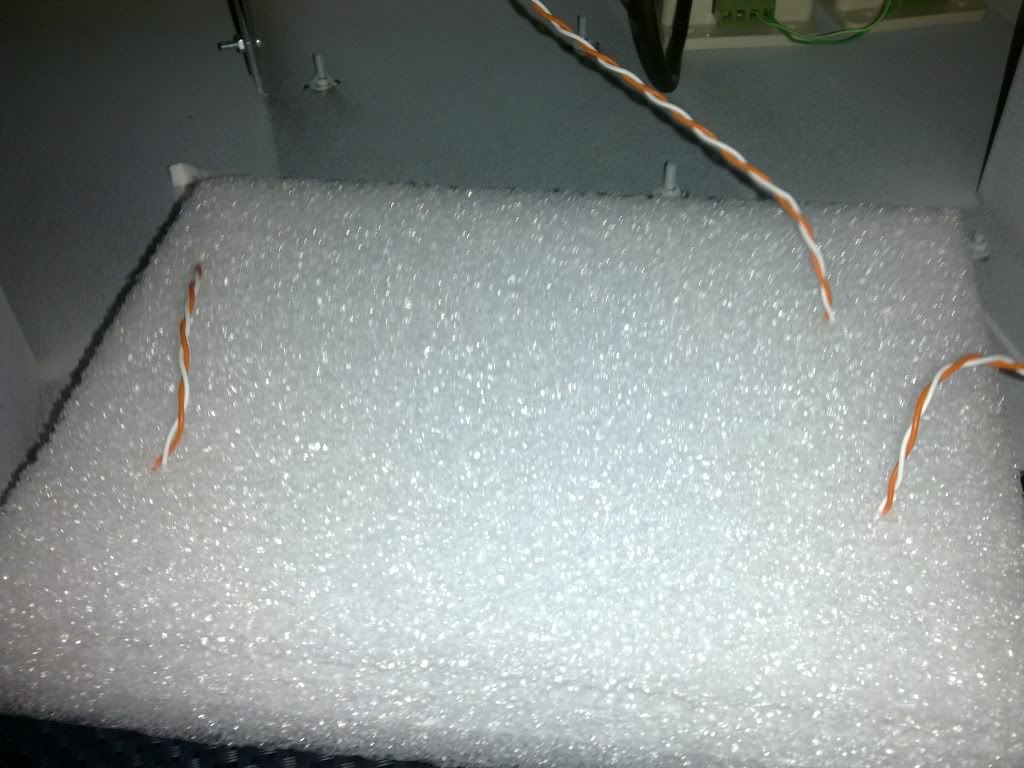
When all panels iscovered, it looks somethinglike this:
I also hooked up the backlight power for the TQ at the end of the last LED strip, sonow the TQ is dimable as well. Really needed that last thing, cuz the LEDs in the TQ was to bright only hooked up to the power.
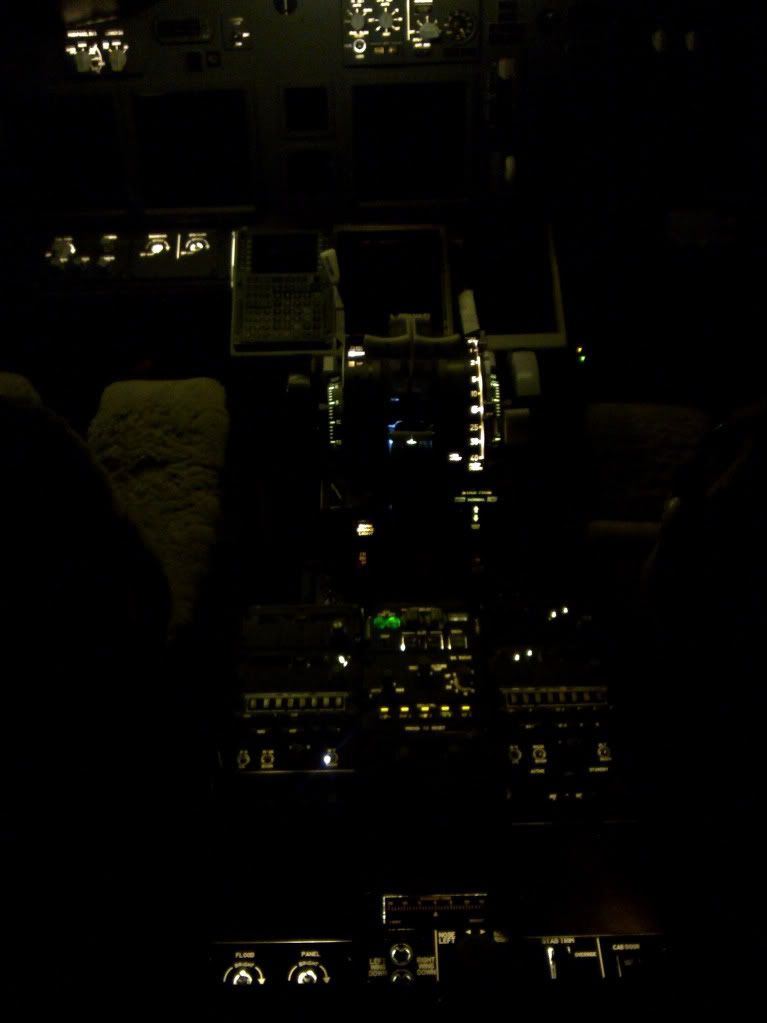
The last pic doesnt show it by far as well as it looks, but take my word. Besides some leaks betwen panels it looks really great.

 Reply With Quote
Similar Threads
-
Please help me build one of these...
By seedmuse in forum Welcome to MyCockpit New here? Introduce Yourself!Replies: 9Last Post: 12-06-2009, 09:35 PM -
Oslo - Norway
By nax228 in forum Welcome to MyCockpit New here? Introduce Yourself!Replies: 2Last Post: 01-09-2009, 10:00 AM -
Hello from Oslo - Norway
By Volante in forum Welcome to MyCockpit New here? Introduce Yourself!Replies: 2Last Post: 10-19-2008, 10:30 AM -
New build for FSX
By rhotrium in forum Computer Hardware SetupReplies: 19Last Post: 04-26-2008, 11:38 PM -
Lag with new gc build
By Anders Eriksson in forum PM General Q & AReplies: 4Last Post: 01-26-2006, 04:44 AM


This radio panel is advertised on Ebay. Does anybody know if I can use it with fs2004 Win7? It...
flightsim radio panel usbc....