

 Section
 Categories
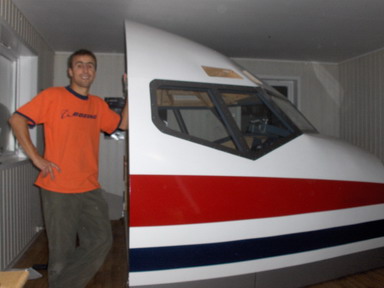 Ivar Hestnes, delivers another useful tutorial. This time he takes us through the 737 Wooden Shell. The one addition in your cockpit which goes a long way in improving its look and feel. Seems Interesting...so sit back and enjoy the tutorial
This is a description of how I covered my homemade shell-structure with plywood. My guide is mostly by pictures with some comments. Most of this process is self-explaining and no need for me to ruin that with my bad writing. This would be ideal also for covering the FDS-shell structure if plywood is the chosen material.
This is a very time consuming job to do but it is not difficult and anyone with the proper tools can do it. Be prepared for a 75-100 hour journey. But it is worth the effort. Please read through this manual and study the pictures several times before you start. Maybe you want to do some things a little different.
Material list for my 737 shell was as follows:
7 sheets of 4mm plywood
19 tubes of glue that stick 26kg/square cm.
ca 600 self-drilling screws, about 15mm with threads
Tools that can be handy are as follows: Drill with different bits
Hand operated saw
Jigsaw
Table saw for slicing plywood strips
Electrical sander
A miter saw is always helpful
Knife
Screwdrivers
Let us get started
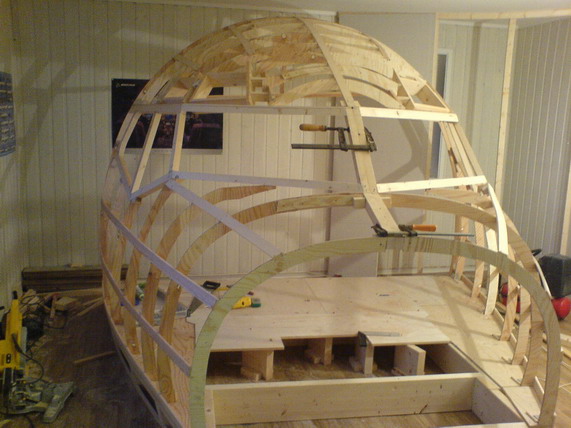
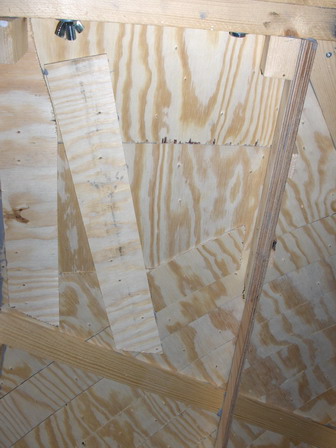
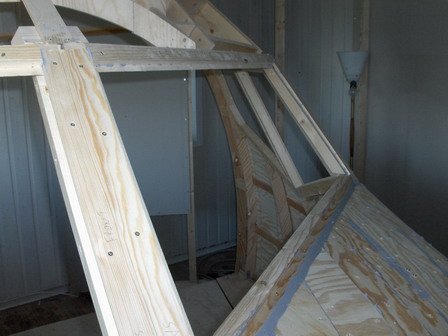
Plywood sheets can be sliced in two directions. Try it so you understand that if sliced correctly, the strips will be very easy to bend. Slicing the other way it will be harder to bend and harder to work with.
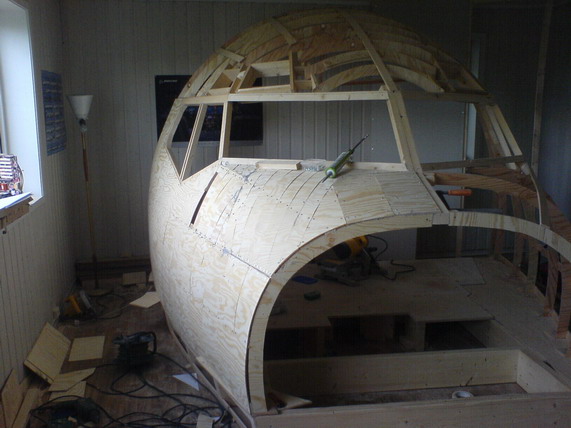
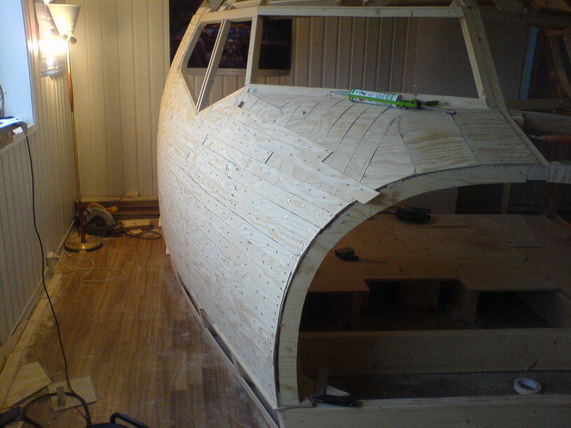
On the picture below you can see the first layer of plywood attached. It is very rough as you can see. The whole side is covered with 20cm wide strips and they are attached vertically. At the front end of the shell the shape gets more complex and I used 6cm wide strips and some other interesting pieces at the absolute front.
It is OK with some gap between the plywood strips on the first layer. But the more work you put into the first layer the better the end result will become. Be careful all the time to follow the cockpit shape as good as you can.
Drink a lot of coffee between the struggles and enjoy the work as you progress.
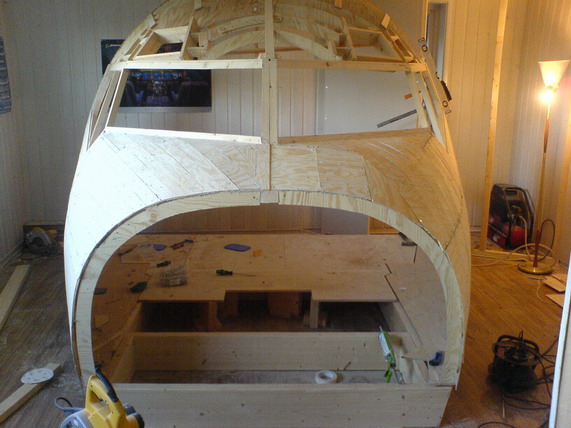
Some pictures of first layer shown from inside the shell.
At the front end I glued some extra strips under the first layer to help getting the shape right. This might be a smart thing to do in difficult places as you can see on the picture below.
Here you can see the first layer on the roof almost done. Very rough but after sanding and use of jigsaw, it is good enough to attach the second layer.
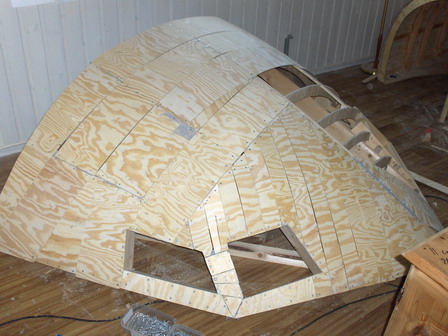
The most important with the first layer is to get the shape right and provide a place for gluing the second layer in place.
When finished with the first layer and the glue has dried securely, unscrew all the screws. You don?t need them. The glue is stronger anyway.
On the first layer I used ca 300 screws per side. That is 900-1000 screws for both sides and roof.
On the second layer I used ca 600-700 screws per side. More tight between all the screws because of thinner strips and to make sure the second layer sticks properly to the first layer.
One more picture from inside the shell
At the front end I glued some extra strips under the first layer to help getting the shape right. This might be a smart thing to do in difficult places as you can see on the picture below.
Here you can see the first layer on the roof almost done. Very rough but after sanding and use of jigsaw, it is good enough to attach the second layer.
The most important with the first layer is to get the shape right and provide a place for gluing the second layer in place.
When finished with the first layer and the glue has dried securely, unscrew all the screws. You don?t need them. The glue is stronger anyway.
On the first layer I used ca 300 screws per side. That is 900-1000 screws for both sides and roof.
On the second layer I used ca 600-700 screws per side. More tight between all the screws because of thinner strips and to make sure the second layer sticks properly to the first layer.
One more picture from inside the shell
Let us start with the second layer.
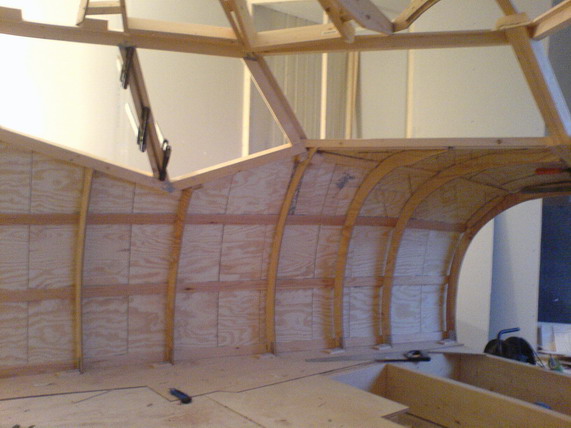
On the second layer I used 6cm wide strips. These thin strips will be easier to work with than thicker strips and help us get the shape we want. It will also save us a lot of sanding. They must be glued tightly together to avoid gaps. Glue the strip-joints also. The second layer must be glued in a crossing pattern to the first layer to get the strength we want. This is very important!
I glued and screwed the second layer of strips horizontally onto the first layer as you can see on the picture below. Please use lots of glue. That?s not the right place to save money.

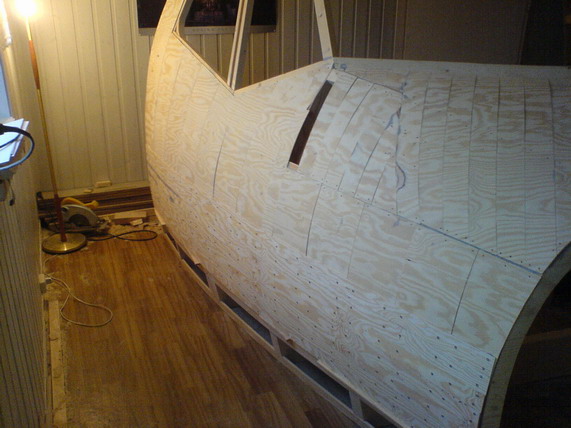
On the picture below, you see that f/o side is covered with 2 layers and 1 layer on capt side
I glued and screwed the second layer of strips horizontally onto the first layer as you can see on the picture below. Please use lots of glue. That?s not the right place to save money.
On the picture below, you see that f/o side is covered with 2 layers and 1 layer on capt side
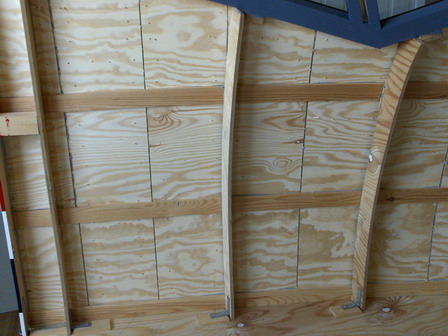
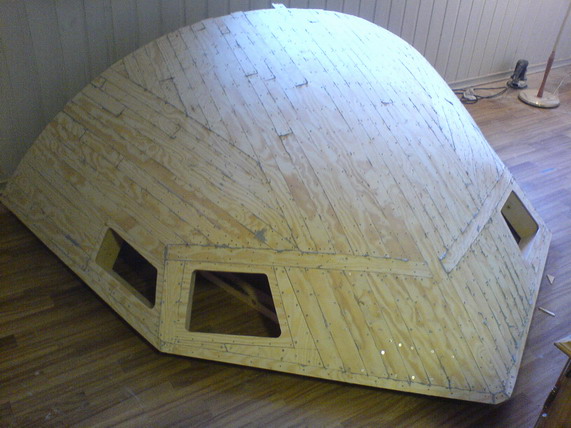
Here you see how I made the second layer on the roof to get the window openings shaped.
Please unscrew all the screws and fill the holes with glue or elastic filler. You don?t like the screws there anyway. Before or later they will unscrew themselves since wood is a living material and screws are not. That would be really ugly.
That?s it
Hopefully you have an even better result than mine.
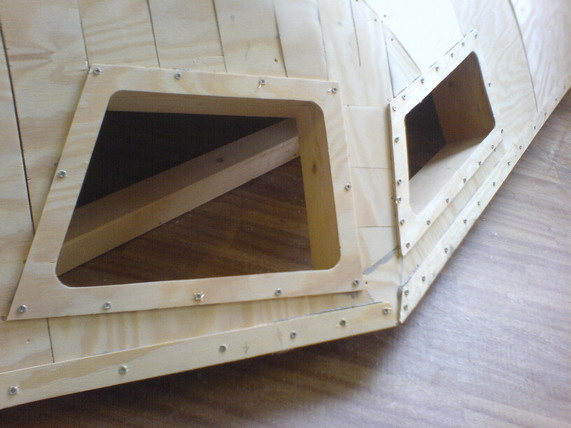
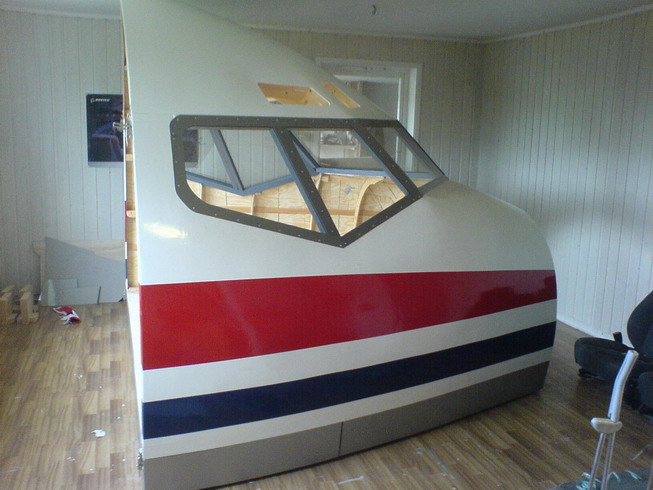
Something to consider are if you want to put glass in the window frames. If so, don?t cover the frames completely with plywood. If done my way, you have 8mm thick space for glass. That will suit nice for 4mm glass and rubber-tape on both sides. Se picture below and you get the idea
That?s it
Hopefully you have an even better result than mine.
Something to consider are if you want to put glass in the window frames. If so, don?t cover the frames completely with plywood. If done my way, you have 8mm thick space for glass. That will suit nice for 4mm glass and rubber-tape on both sides. Se picture below and you get the idea
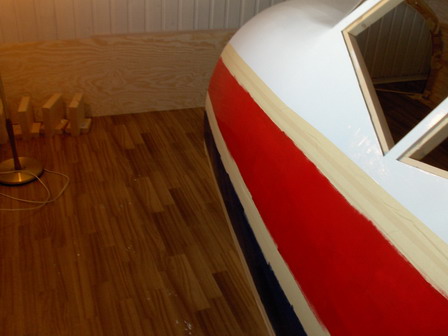
Everybody loves to see a nice livery
After sanding the shell you should consider using filler.
I used filler on the whole shell, and sanded. I did this process twice. Then I attached white primer, and 2 layers of white paint. Still you can see the ply-strips through the paint, but who cares
I also made metal frames around the windows to get the look even more authentically. I don?t regret that. I am very happy with the end result and would love to see other builders get a nice shell with their favourite livery
Best regards
Ivar Hestnes