

Results 11 to 20 of 60
-
03-14-2011, 09:46 PM #11150+ Forum Groupie

- Join Date
- Apr 2008
- Location
- Graham, WA
- Posts
- 296
Re: Collimated display build thread...
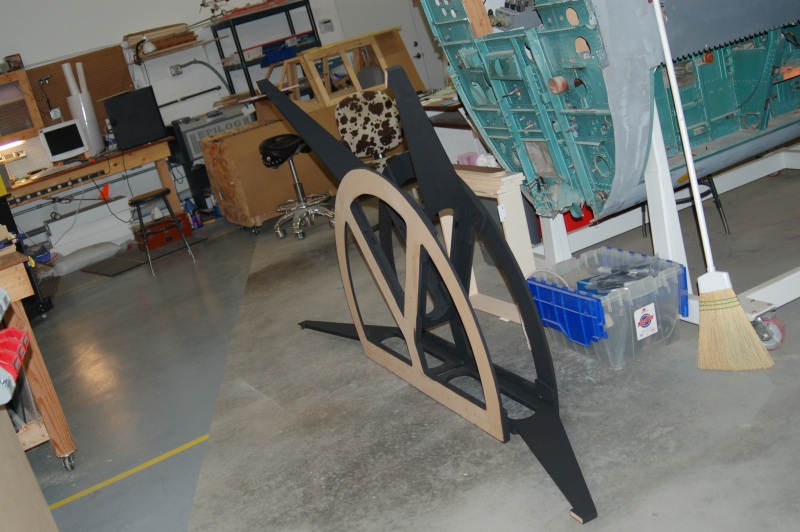
I just finished putting sanding sealer on the table parts. Flat black paint is next.
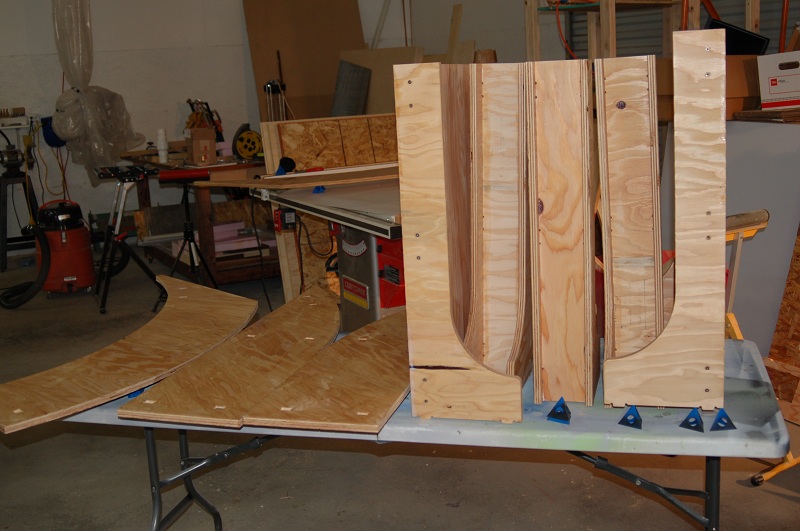
The three primary legs and the two "ear" legs have been assembled.
g.
-
Post Thanks / Like - 1 Thanks, 0 Likes, 0 Dislikes
 Matt Olieman thanked for this post
-
05-01-2011, 01:19 AM #12150+ Forum Groupie
- Join Date
- Apr 2008
- Location
- Graham, WA
- Posts
- 296
Re: Collimated display build thread...
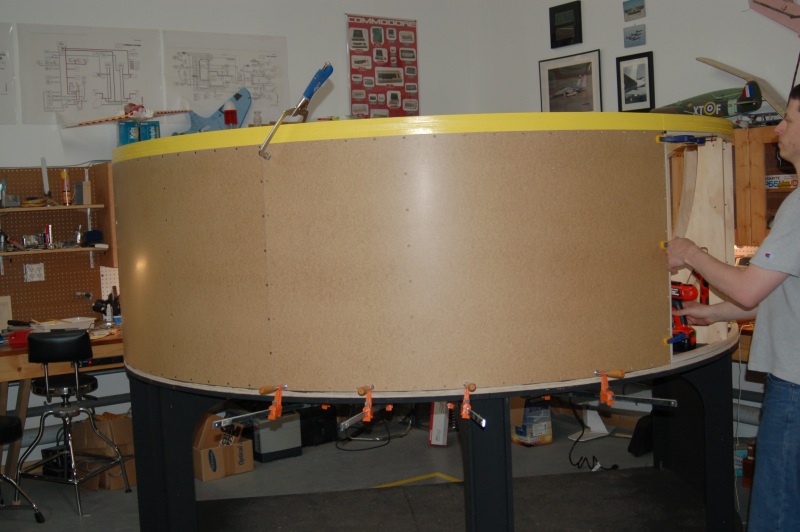
We got a ton of assembly work done today!
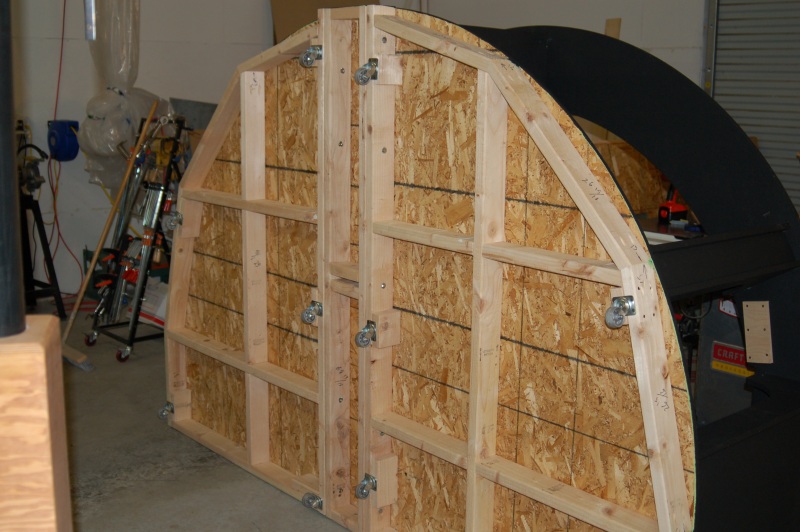
The above photo shows the underside of the base plate that the mirror table & framework sits on. The base is made from 2x4s with OSB sheeting. I got the base assembled & painted a few weeks ago.
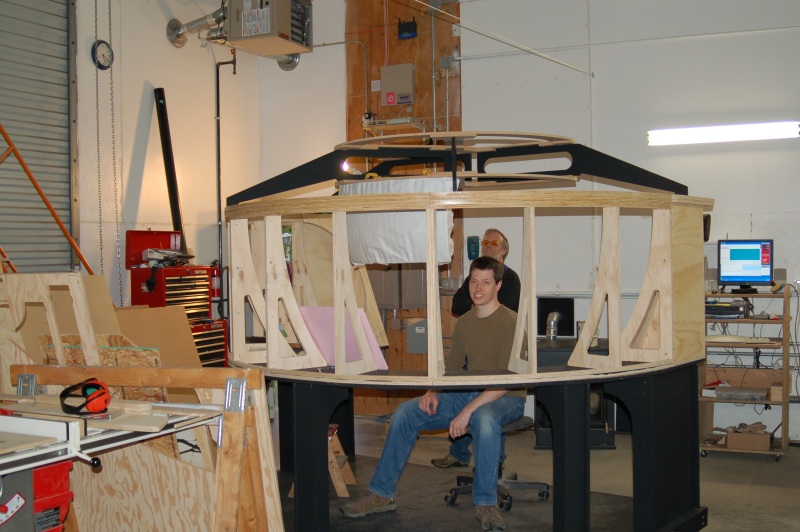
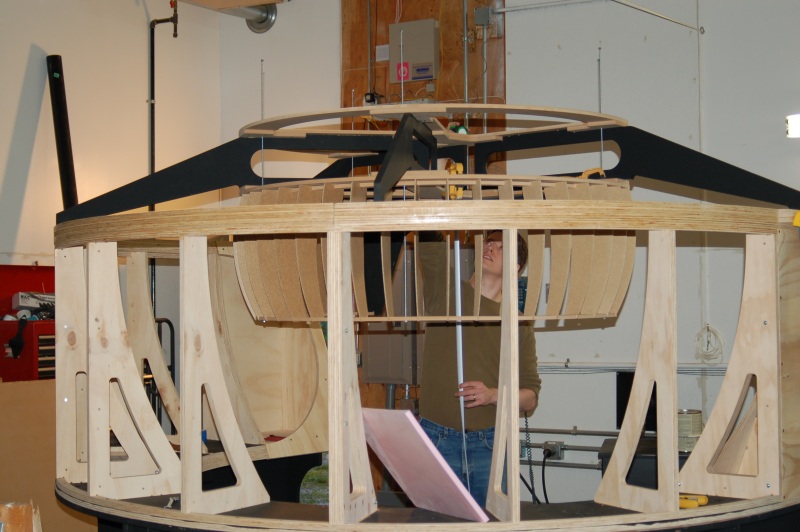
We got the mirror framework assembly completed today. Here's what that looks like:

Here's a picture of me sitting in there to give you an idea of scale:

I'll try to get more frequent posts as we get more done.
ttyl!
g.
-
Post Thanks / Like - 3 Thanks, 0 Likes, 0 Dislikes
-
05-09-2011, 12:02 AM #13150+ Forum Groupie
- Join Date
- Apr 2008
- Location
- Graham, WA
- Posts
- 296
Re: Collimated display build thread...
More pics!
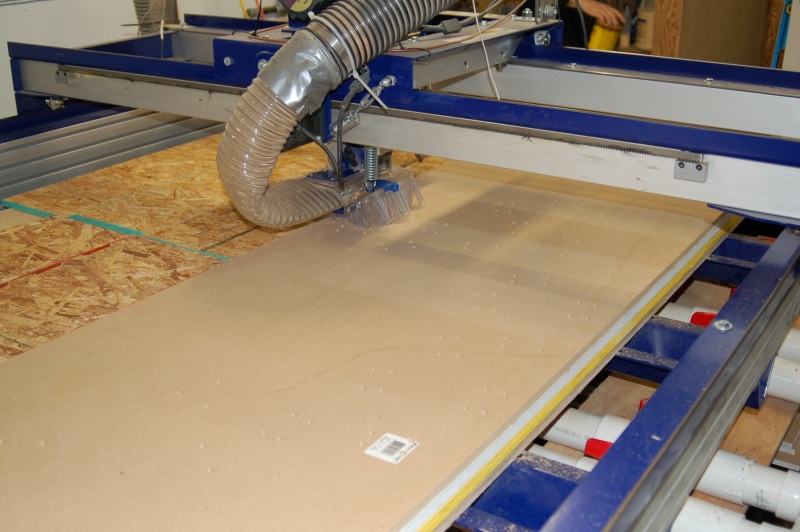
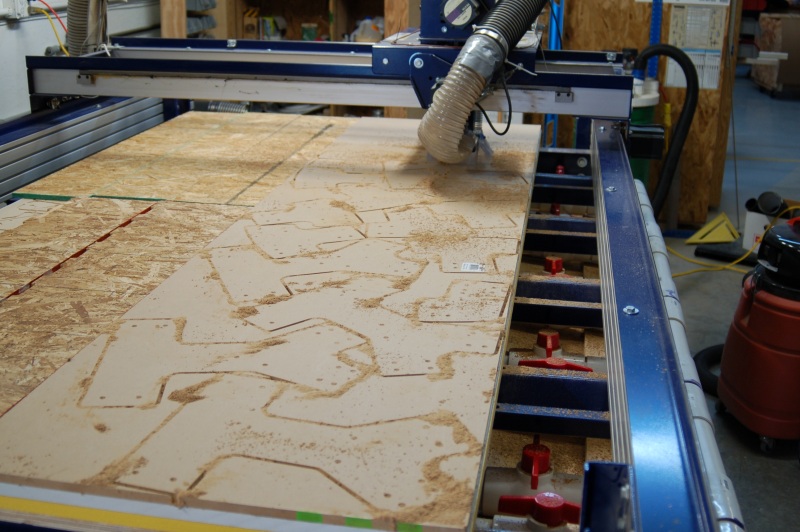
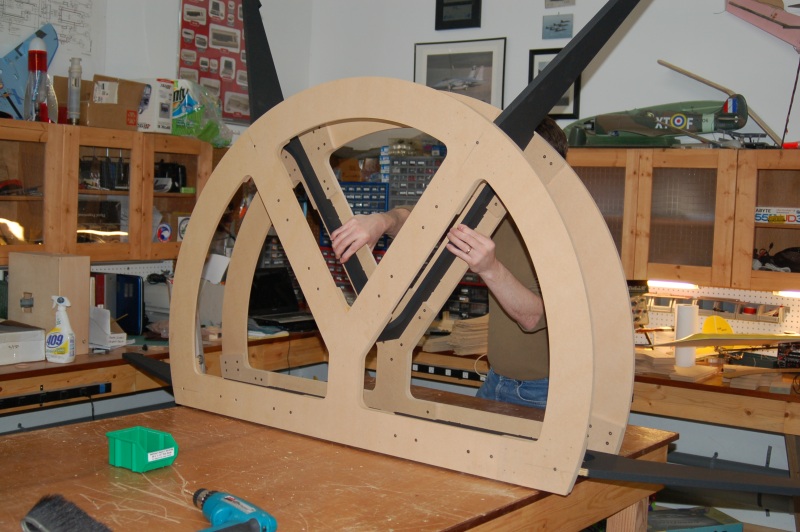
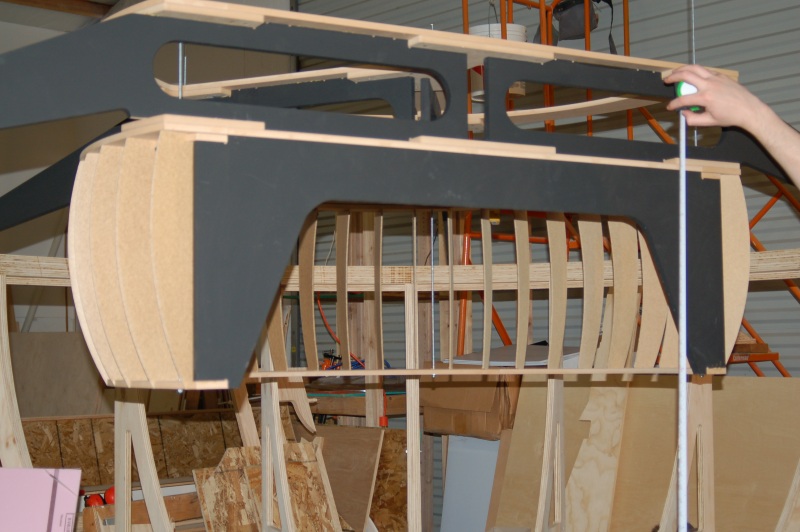
 Wayne & I got some great work done this past Saturday and the framing parts for the new screen were cut out of Ultralight MDF. (it weighs roughly 60% of the standard MDF you get at your local BORG)
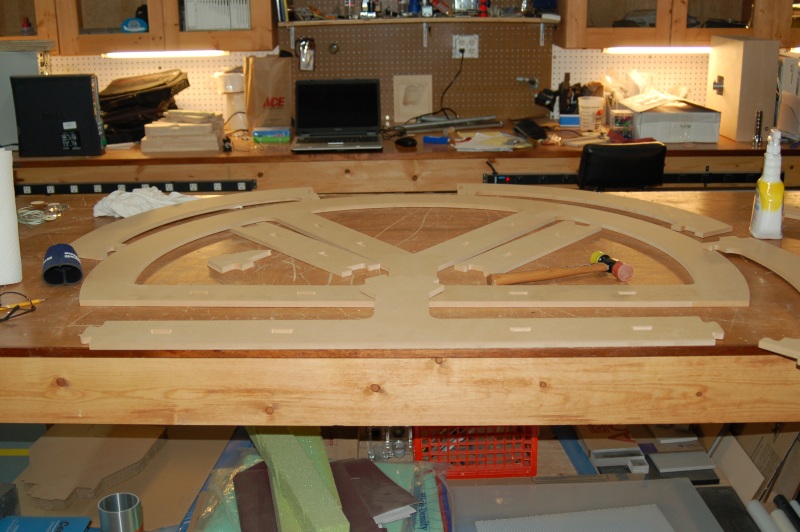
The large half-circle assemblies are made up of a few different parts in order to get the max utilization out of the 4x8 sheet of ULMDF. One will hold the projectors and the other will form the "lid" of the screen. The small arcs are mounting rings that will become the upper and lower frames of the "blades" that will form the screen. It's hard to see now, but you'll get the idea really fast once it's assembled.
g.
-
Post Thanks / Like - 3 Thanks, 0 Likes, 0 Dislikes
-
05-15-2011, 12:04 PM #14150+ Forum Groupie
- Join Date
- Apr 2008
- Location
- Graham, WA
- Posts
- 296
Re: Collimated display build thread...
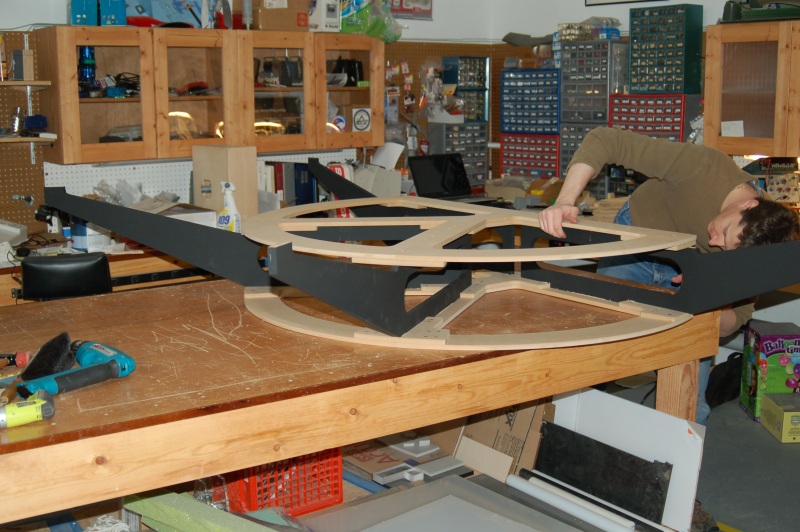
Yesterday (5/14) we got the screen & support "spider" assembled from the parts that were cut last week.
Wayne's got a slick little camera that does time-lapse video, so he set it up to capture the screen assembly process:
I've got pictures of the whole thing that I'll get posted soon.
g.Last edited by Matt Olieman; 05-15-2011 at 12:08 PM.
-
Post Thanks / Like - 1 Thanks, 0 Likes, 0 Dislikes
Matt Olieman thanked for this post
-
05-15-2011, 12:28 PM #15Executive Vice President, MyCockpit


- Join Date
- Oct 2005
- Location
- Ocala, FL USA
- Posts
- 2,884
Re: Collimated display build thread...
I love it!!! Thanks
Matt Olieman
-
05-15-2011, 02:37 PM #16150+ Forum Groupie
- Join Date
- Apr 2008
- Location
- Graham, WA
- Posts
- 296
Re: Collimated display build thread...
This update should cover the past couple of weeks worth of work...
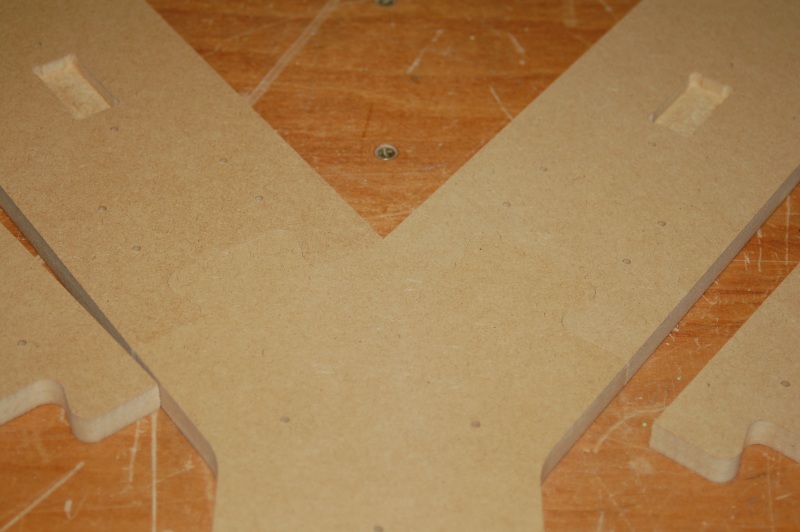
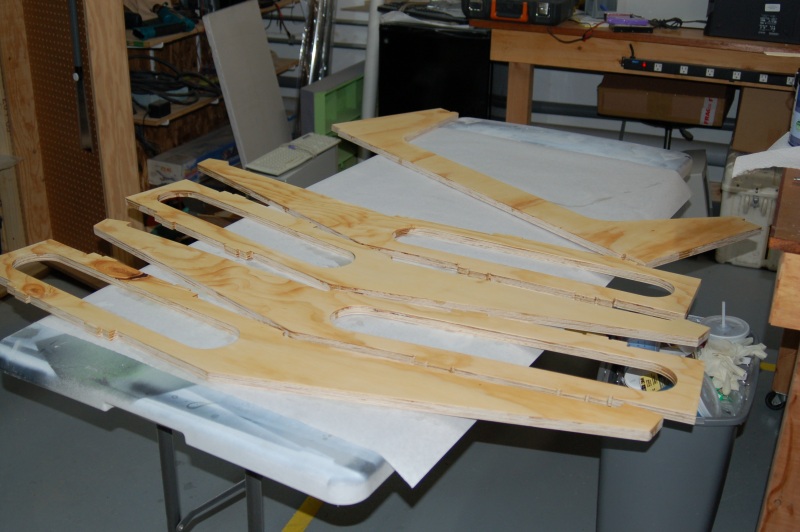
The "spider" arms for the screen & projector support platform were cut out last weekend.
Here's what they looked like right after getting sanded & painted with shellac sanding sealer:
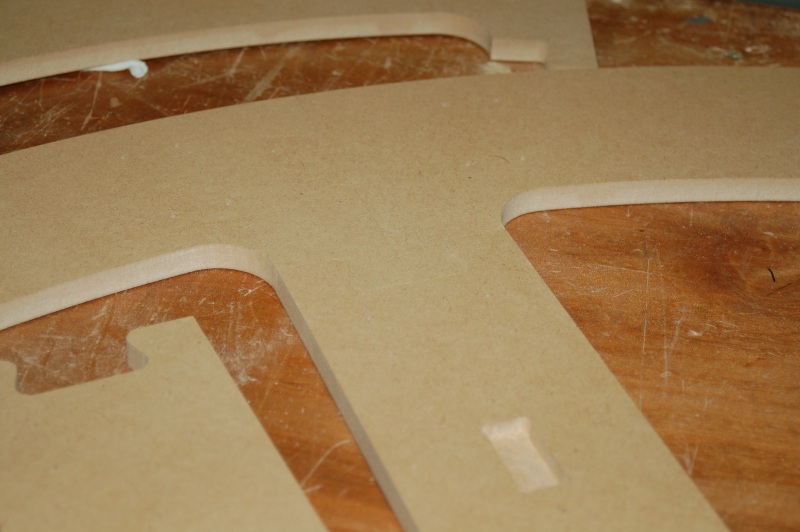
In order to strengthen the material joints in the screen support parts, we needed to cut a set of doublers. Part of this was seeing if we could get the 'bot to do the countersinks for us. I had a 3/8" 82 degree countersink that I could fit to the 1/4" collet on the 'bot. Wayne created a file in VCarve that would have countersinks at various depths - turns out .210" is perfect for a #8 flat head screw:
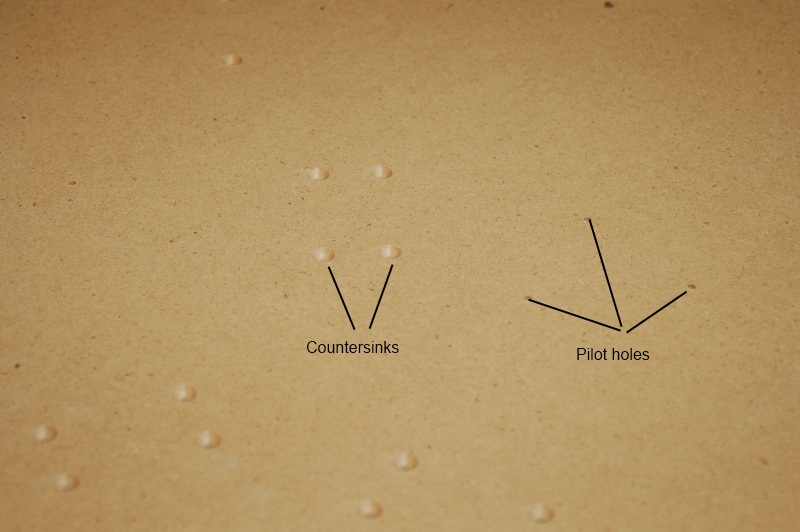
Having the 'bot do all these is a LOT easier than me doing it with a microstop!
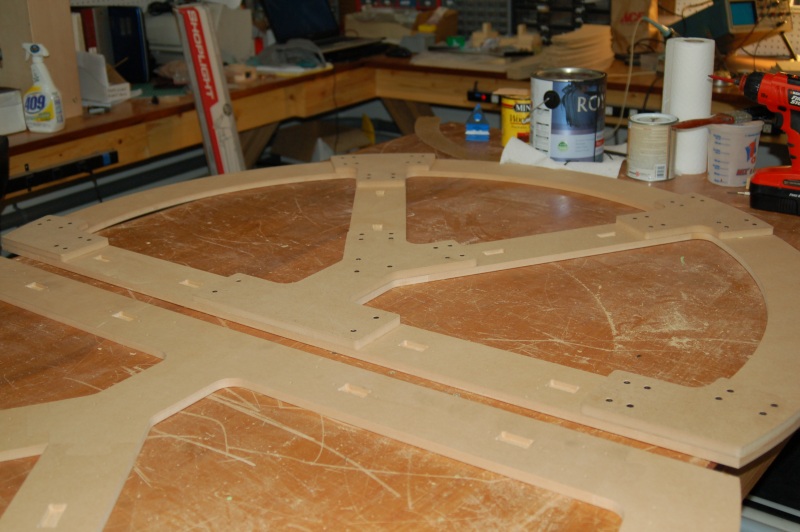
This is what the doubler parts looked like as they're being cut:
...and after being glued & screwed to the screen support panel:
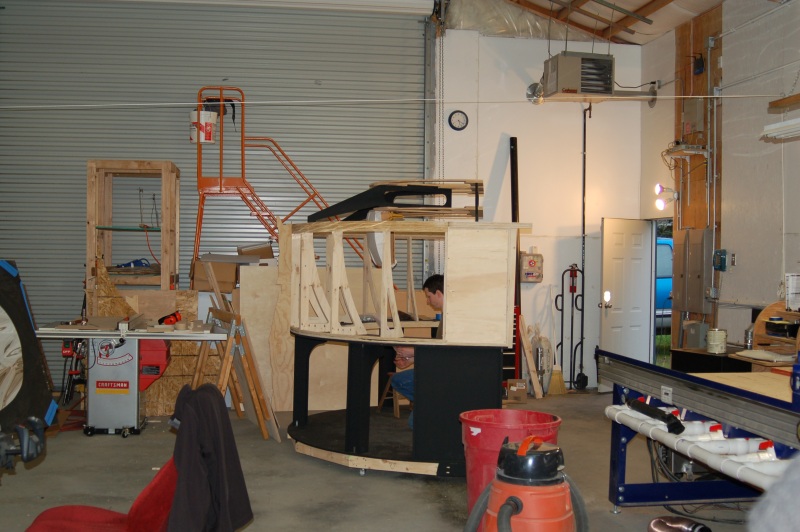
After getting those in, we added the "spider" legs - you can see from the picture why I call them that:
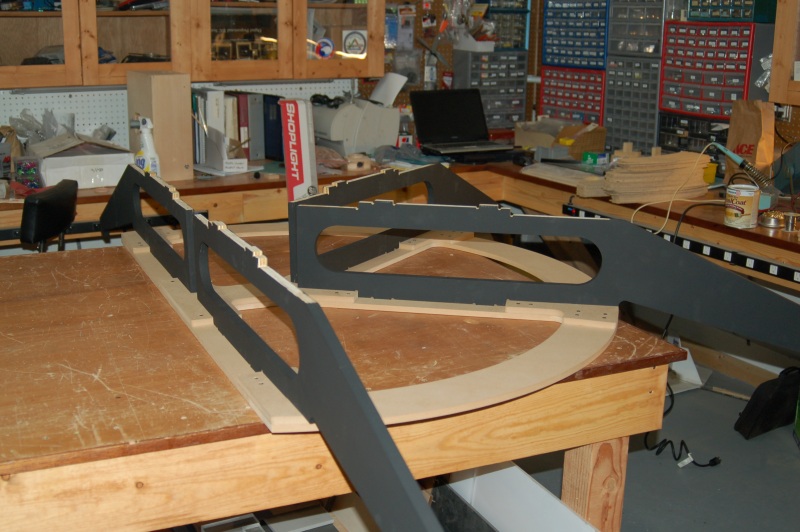
Here's a picture of what it looked like after we got the top layer added.
Like most spiders, this one doesn't like being on its back...
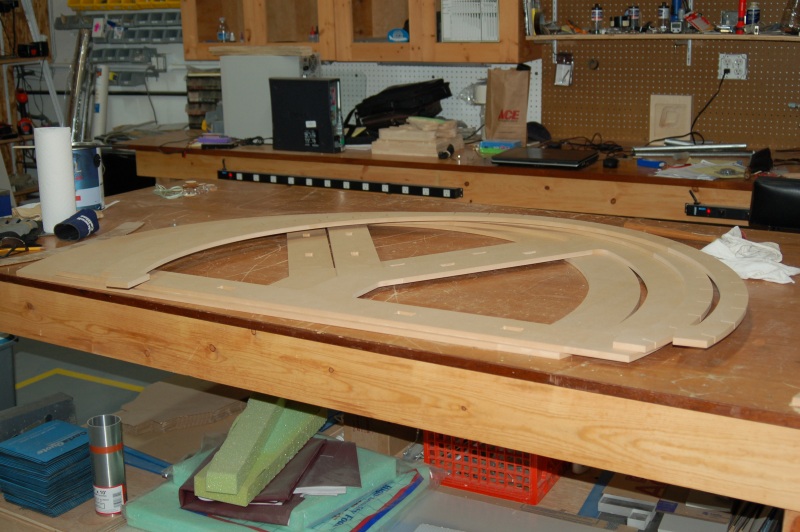
Here's a long shot with the screen support resting on the mirror framework.
Just for the heck of it, Wayne clamped in the first screen section we ever built - this is actually a small slice of the full size screen you saw being assembled in the time-lapse video.

I figure I'll hang on to that ratty old thing - who knows, the Smithsonian might want it some day. *laughs*
This picture is pretty amusing. Wayne is all, "Hurr! This is SO cool!", while my friend Rob is all, "Hrmm. I do believe we CAN take over the world with this!"
Please note the pink foam screen analog. It's about the right size for a 19" display.
Here's a couple of shots with the screen installed:
I would have taken a wider angle shot, but I couldn't back up any further while it was in the location it was. Stupid thing is so big you have to back WAY off to get it all in one frame!
During the week I'll be applying sealer to the screen frame components and the screen mounts so they can be painted. With any luck we'll be able to get the foam inserts installed into the screen soon!
g.
-
05-15-2011, 05:30 PM #17Executive Vice President, MyCockpit
- Join Date
- Oct 2005
- Location
- Ocala, FL USA
- Posts
- 2,884
Re: Collimated display build thread...
This is truly amazing... SO impressive!!!! NICE WORK!!!!
Matt Olieman
-
05-22-2011, 05:24 PM #18150+ Forum Groupie
- Join Date
- Apr 2008
- Location
- Graham, WA
- Posts
- 296
Re: Collimated display build thread...
Update for the work done on Saturday, 21May11:
The screen support "spider" is completed and painted:
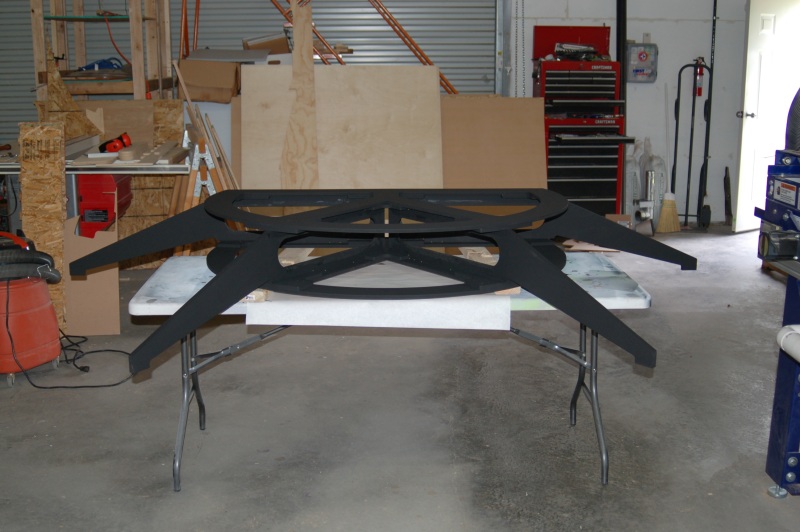
The only remaining work that needs to be done is to have the projector mounts located & drilled.
We got the foam blocks cut for the screen. That stack of material used to be four 96" x 24" sheets. Wayne built a slick jig that allowed them to be bevel cut without getting your fingers too close to the saw blade.
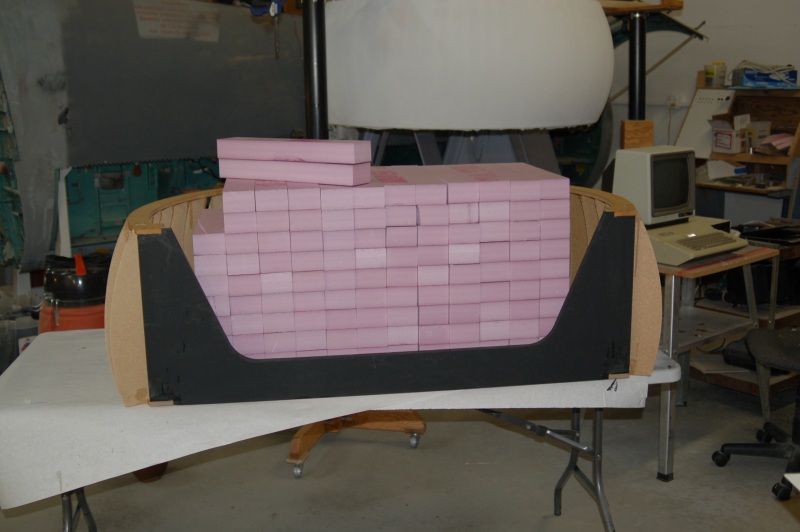
The blocks shown above were hot-wire cut in a special jig that used spare ribs from the screen in order to get the shape perfect.
Look carefully at this picture:
Can you understand why I'd want to whack it with a crowbar as I went by?
Each mirror segment and the backs are sealed with a 1/32" rubber gasket to minimize the amount of air leaks in the system.

Applying the framework back panels...
The colors for the frame will be yellow for the "ear" boxes and peripherial framework and blue for the back panels. Gotta keep with the whole Simpits/Link Trainer colors you know.
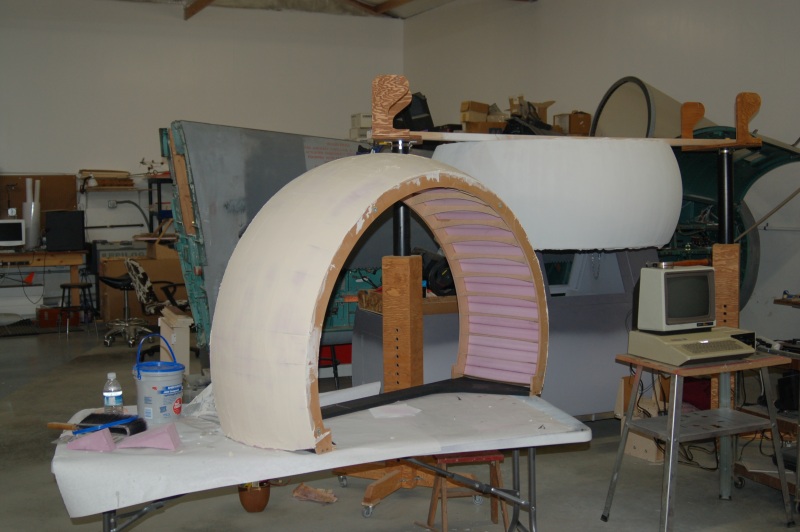
We also test-fit the new goggle-mask.
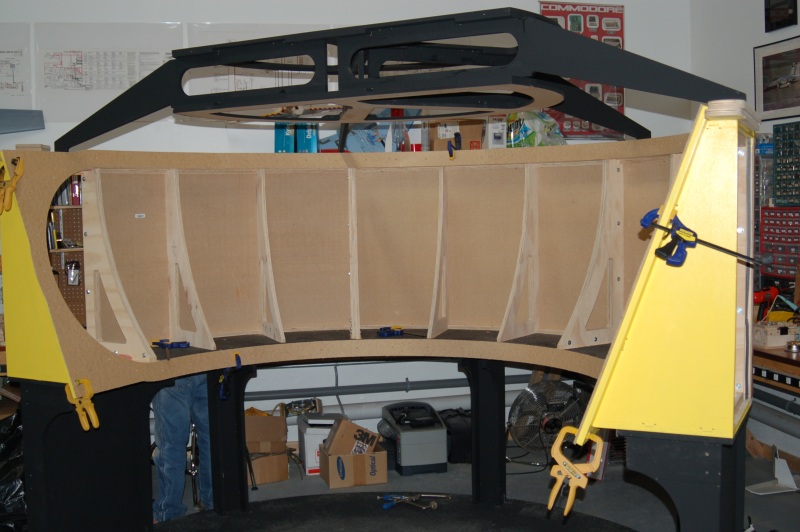
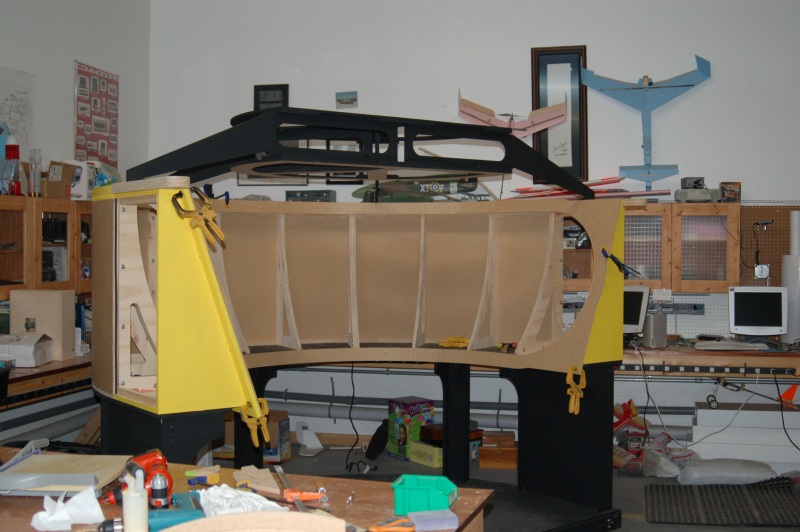
It's quite likely that when the mask is attached "for real" to the framework, the mylar for the mirror will follow shortly behind. Right now we figure we're only one or two work days from performing the first draw-down of the mirror.
The screen was assembled and the first layer of filling compound was applied.
Once the sand/fill cycle is done and the shape is correct, I've got some Behr screen paint we're going to try with it.
Thanks for reading!
g.
-
Post Thanks / Like - 8 Thanks, 0 Likes, 0 Dislikes
mndless, wledzian, Neil Hewitt, Hessel Oosten, riche543, brianwilliamson, Joe Cygan, Matt Olieman thanked for this post
-
06-05-2011, 01:03 PM #19150+ Forum Groupie
- Join Date
- Apr 2010
- Location
- Auburn, WA
- Posts
- 197
Re: Collimated display build thread...
We made more great progress yesterday. Once we were confident that we'd have the mylar in place, we decided to take advantage of the sunny day for a barbecue.
We worked late into the night, and got the mirror mounted, the screen painted and mounted, and one projector tested.
Drawdown of the 220° mirror
More to come!
-
Post Thanks / Like - 2 Thanks, 0 Likes, 0 Dislikes
-
06-05-2011, 01:31 PM #20Executive Vice President, MyCockpit
- Join Date
- Oct 2005
- Location
- Ocala, FL USA
- Posts
- 2,884
Re: Collimated display build thread...
I agree, it's insane

FANTASTIC!!!!!!!
Matt Olieman

 Reply With Quote
Similar Threads
-
Question about collimated display systems.
By mikesblack in forum Collimated Display DiscussionsReplies: 326Last Post: 07-22-2019, 10:36 AM -
Scratch build 6 digit LED display for GoFlight remote kits
By deanpca in forum I/O Interfacing and HardwareReplies: 0Last Post: 04-23-2010, 10:57 AM -
PROS and CONS of LCDs,Collimated,Projector systems ???
By Ross182 in forum General Builder Questions All Aircraft TypesReplies: 0Last Post: 03-04-2010, 09:37 AM -
first thread whoo hoo
By BlackWidow in forum PM GA GCReplies: 2Last Post: 02-17-2009, 11:07 PM -
Brainstorming for a collimated mirror display
By s4sha in forum Cockpit Outside VisualizationReplies: 40Last Post: 08-27-2007, 01:33 PM


Looking for fun companions for travels and adventures? Authentic Ladies Premier Сasual Dating
Top-notch Сasual Dating -...