

Results 21 to 30 of 37
Thread: Glenn's Generic Fighter Pit
-
05-24-2009, 12:43 AM #212000+ Poster - Never Leaves the Sim


- Join Date
- Oct 2006
- Location
- Southern Illinois, USA
- Posts
- 2,887
Wow! That was very informatitive. Thanks for posting.
Boeing Skunk Works
Remember...140, 250, and REALLY FAST!
We don't need no stinkin' ETOPS!
Powered by FS9 & BOEING
-
05-24-2009, 02:10 AM #2225+ Posting Member

- Join Date
- May 2009
- Location
- Sydney, Australia
- Posts
- 47
Thanks Michael, Gees just reading back over it myself, I had forgotten alot of this information, Particularly the multi monitor problems that I struck.
Oh the hours that I have spent.......
One day I might just get to hop in it & fly !!
I just finished painting my new projector screen today but I will post current status pictures after I finish reconstructing the archived Log.
Cheers Glenn
-
05-24-2009, 02:16 AM #2325+ Posting Member
- Join Date
- May 2009
- Location
- Sydney, Australia
- Posts
- 47
Reconstructed Log
Posted: Thu Nov 25, 2004 1:14 am
Well I have now mounted all the flight controllers, & fitted the sub woofer into the back of the seat..............there is no doubt that I could not go back to a desktop sim ever again, the vibrations in the seat really make a difference to the whole immersion, I have read this many times but it's not until you try it that you realise just how much difference it makes, even whilst using a 15" monitor to look outside.
I have now ordered my main projector, I settled on the BenQ PB6200 it is 1024x768 & 1700 Ansi Lumens DLP unit, It is currently sitting in Sydney waiting customs clearance.
My main aim was to get the sim to a flyable condition by Christmas & I am on target, I have done a few small offline flights now, still much more work to do before I can really go online with VATSIM, gotta get some buttons & knobs going before I take it to that point.
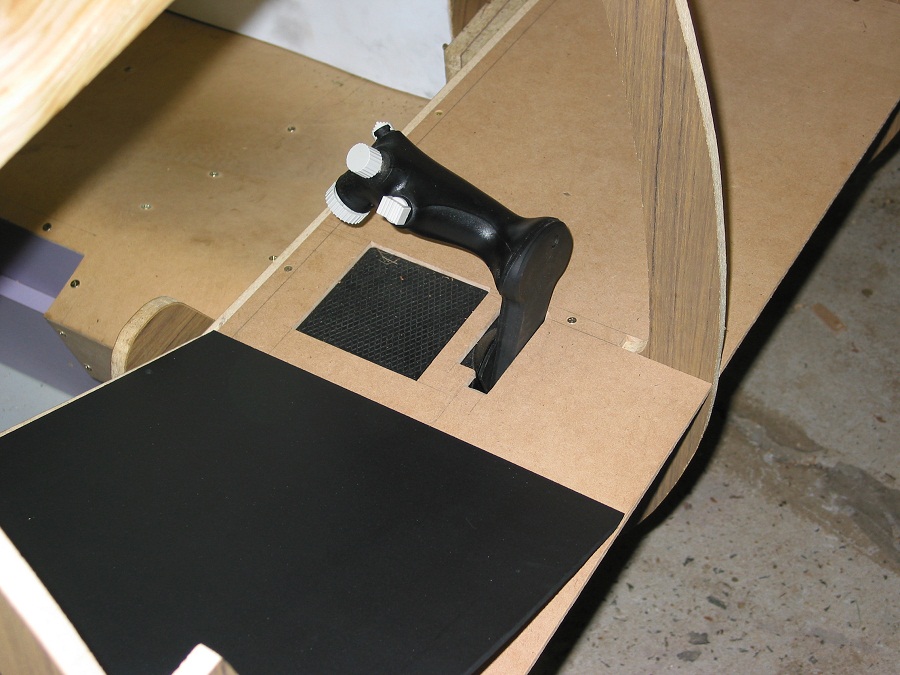
The flight controller mounting was quite a bit of work, The throttle was not too bad, just fiddly cutting out the MDF panels & dismantling the unit so as I could poke the handle through the cutouts. There was no major modifications to the throttle during the mounting.
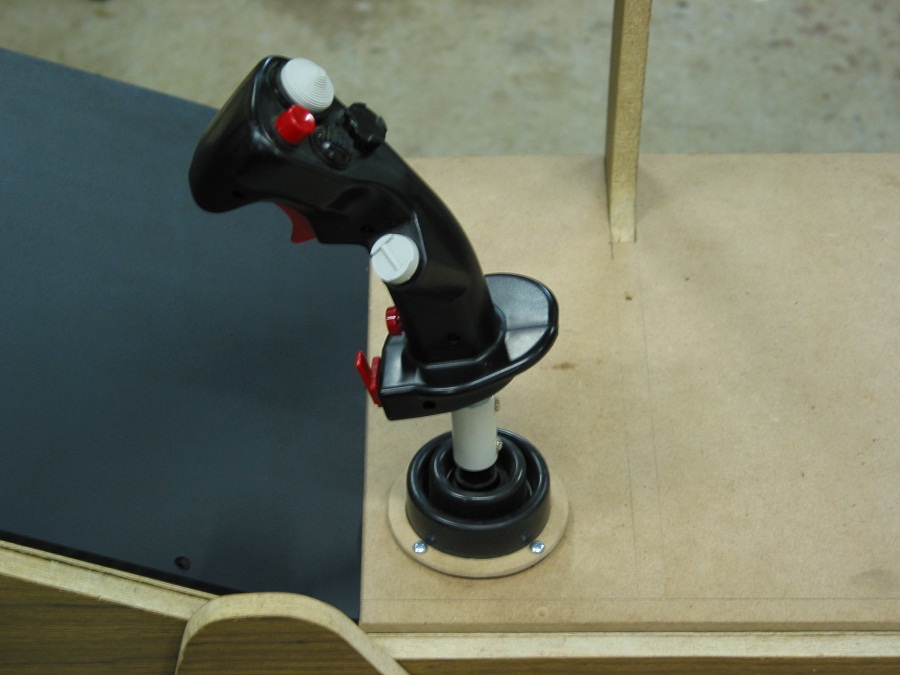
The Joystick however is a different storey, I had to cut about 4-5 CM's off the left side of the base of the controller to get the stick where I wanted it, this meant removing the circuit board from the unit & mounting that in a project box & extending all the cables, The stick once mounted under the panel was way too low & did not feel right, so I had to extend it by a couple of CM's, 16mm electrical conduit & 16mm counduit coupler fitted perfectly & did the job, I also have put a slight bend forward in the stick extention, ergonomics is everything when it comes to the controllers & it feels just right now.
The plastic ring that normally holds the rubber boot in place virtually fell apart when I removed it, so I manufactured a new one out of 3mm MDF, which came out pretty darn good.
I will post some more detailed pictures on the modifications on the stick & the fitting of the Sub woofer when I take them apart again for painting.
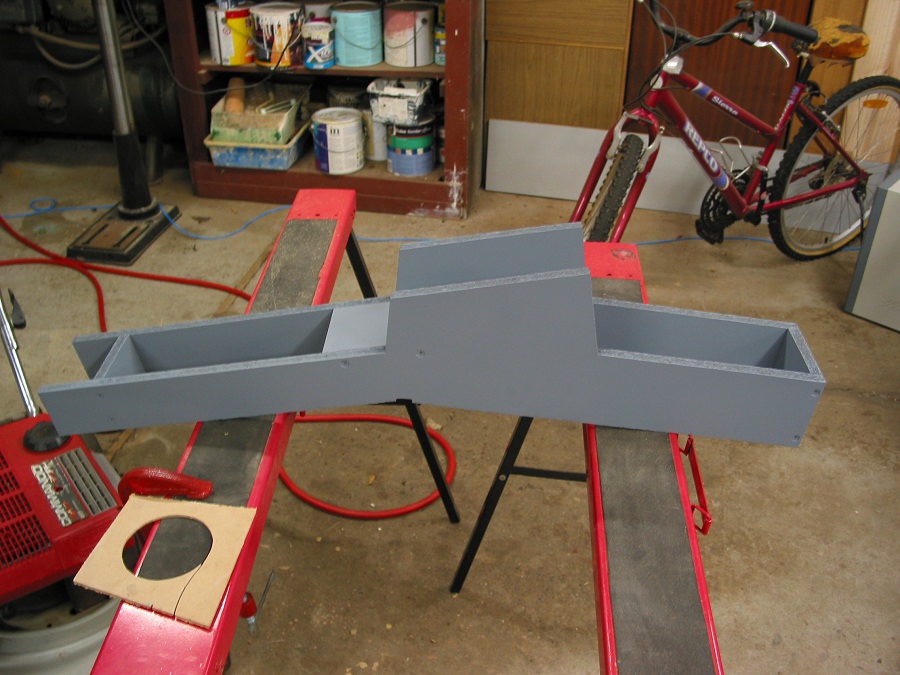
As you can see I have started playing around with some spray paint, I am not happy with the grey that I used, it seems too dark. The matt black panels are fine so I will probably paint the panels up for the next round of photo's.
Cheers for now.
Glenn.
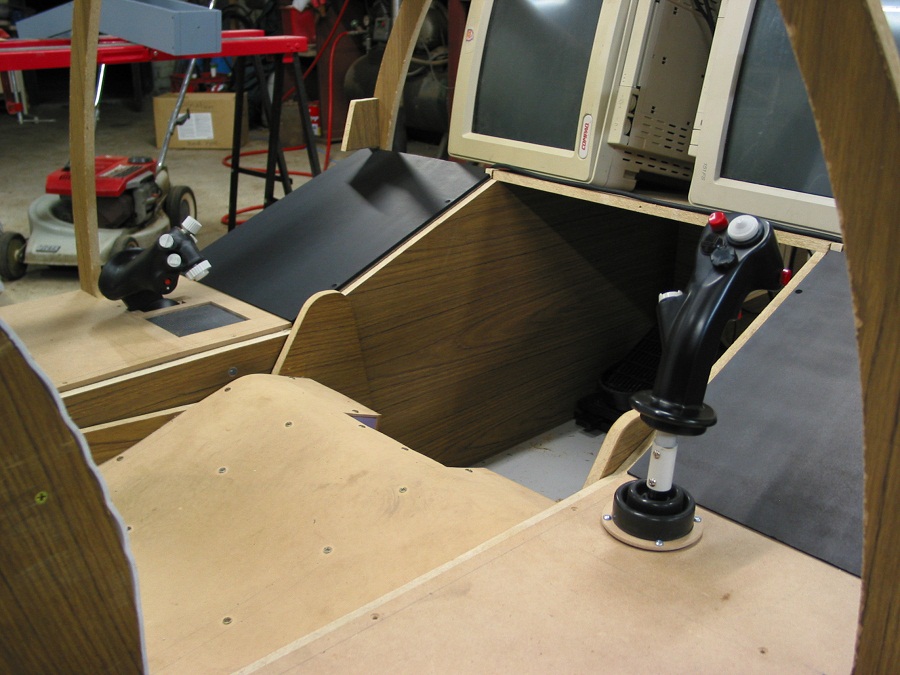
Joystick Pictures.
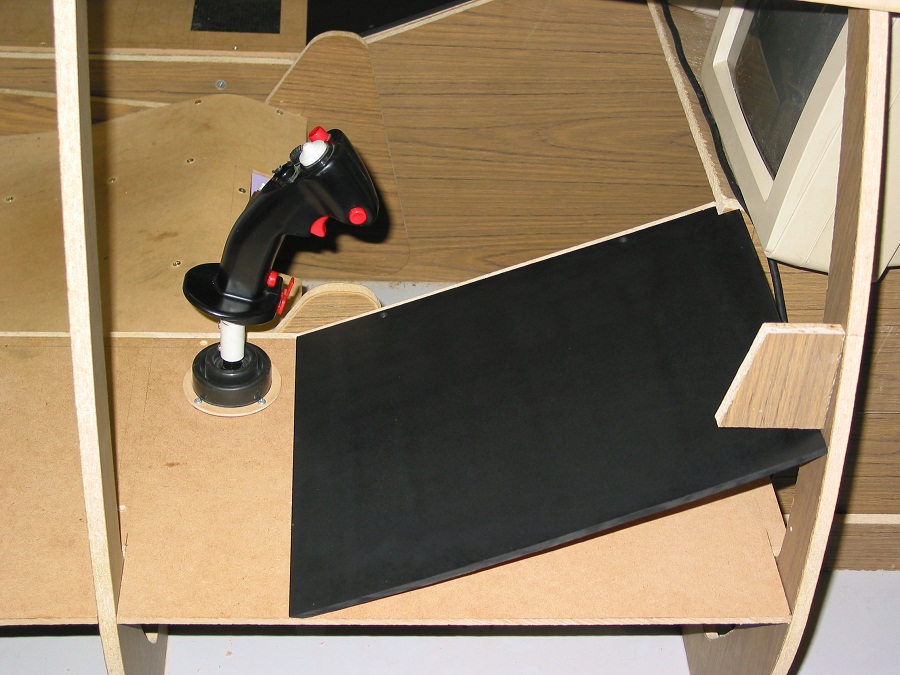
Throttle & sub woofer mounting.

-
05-24-2009, 02:19 AM #2425+ Posting Member
- Join Date
- May 2009
- Location
- Sydney, Australia
- Posts
- 47
Reconstructed Log
Posted: Fri Mar 11, 2005 1:00 am
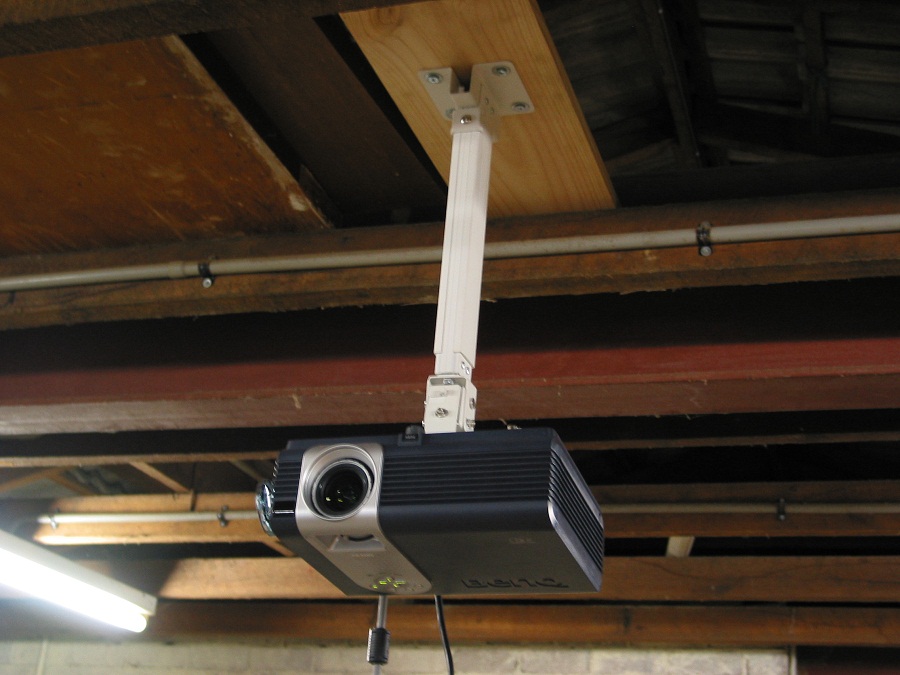
Hi Once again, well I have not done as much work as I would have liked to in the last few months, maybe cause I have been playing with my new projector too much.......I set the projector up in the lounge room for home theatre & have been watching movies every weekend since christmas so it's been getting a workout......I just love it.
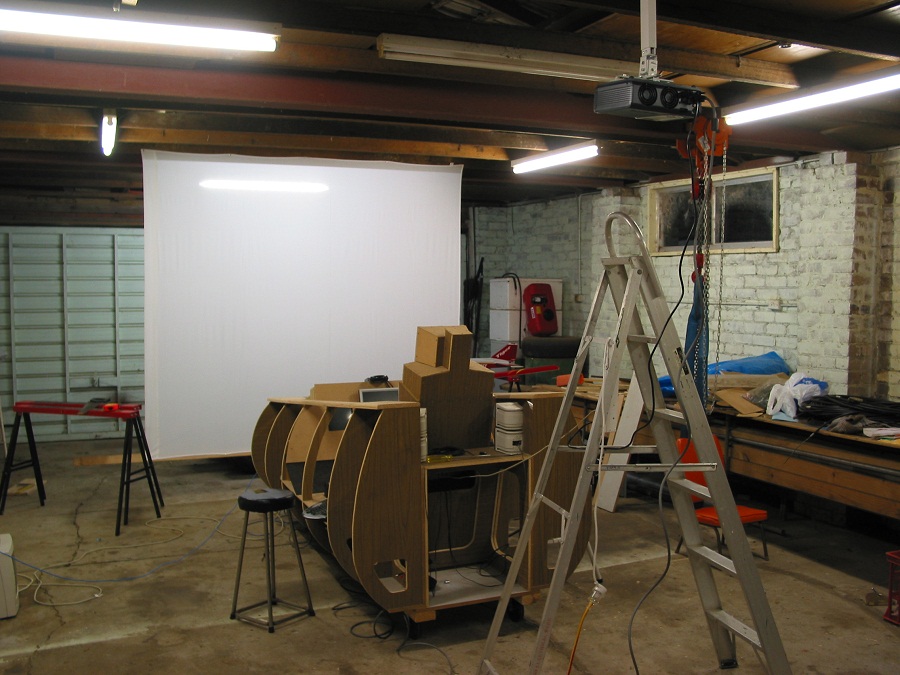
I purchased 2 ceiling mount brackets that are identical, this way I can dismount it very easily from the lounge room & take it to the garage for some simming & vice versa.............Last weekend I mounted the projector down in the garage, threw up a white sheet from the rafters & bingo, a whole new world of simming.
Every time you move forward building a simulator the more it inspires you to go further with it, It's absolutely fantastic on the projector & now there is no turning back, this is the only way to sim!!
I have had a few people in it this week & they just get blown away by it, Even my wife thought it was pretty darn cool......Woohoo, I've got the green light from the boss.
I think sometimes when I tell people what I am trying to build they just don't quite invisage what I can see in my mind.............It's not until you show them that they can see what this fascination is all about.
My flight controllers have had upgrade chips fitted to them that now make them digital sticks, this upgrade was dicontinued last June which I did not know about & had already purchased/mounted the controllers.
Fortunately a fellow builder over in the U.S. offered to send me a set of chips that he was not using anymore, He posted them over & did not want any money for them.
So I would like to acknowledge "Bricklayer" (Craig Rochester) from the viperpit forum which can be found at http://www.viperpit.org/ for his generous contribution to my pit.
That forum has some really good information particularly targeted at the F-16 cockpit, it is worth a look for all builders commercial or military.
A great bunch of guys there too, all willing to help each other out.
Thanks Craig.
Well I will leave a few more pictures of my progress, things are really getting exciting now.
Some things I will be working on soon are:
The Glare shield.
I really have to pull the sim apart for a paint job.
Start working on the radio stack & panels.
I am also revising mounting of the on board computers (pictures soon).
Cheers Glenn.
-
05-24-2009, 02:23 AM #2525+ Posting Member
- Join Date
- May 2009
- Location
- Sydney, Australia
- Posts
- 47
Reconstructed Log
Posted: Fri Mar 11, 2005 1:05 am
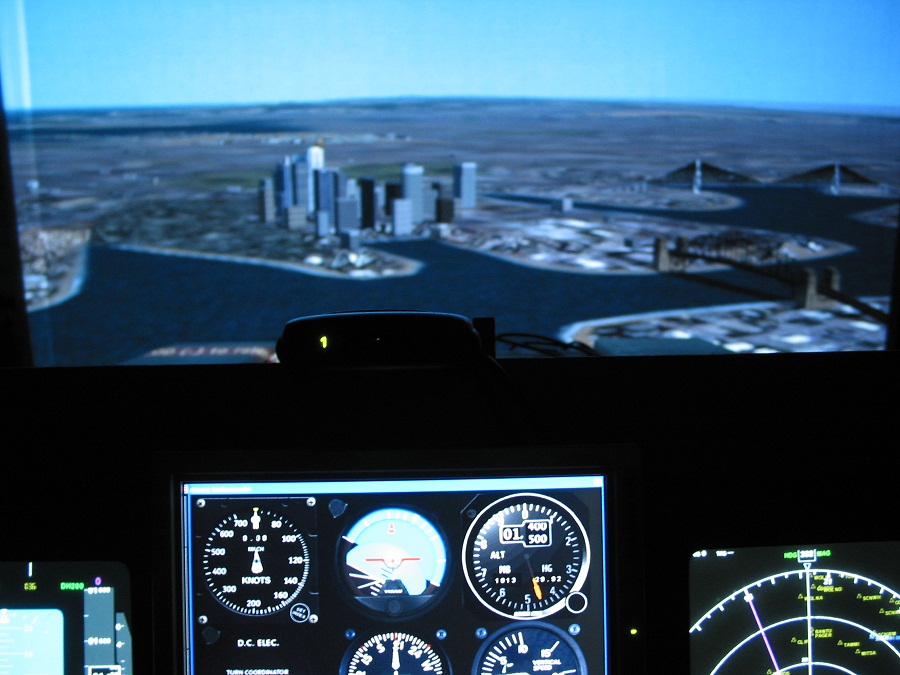
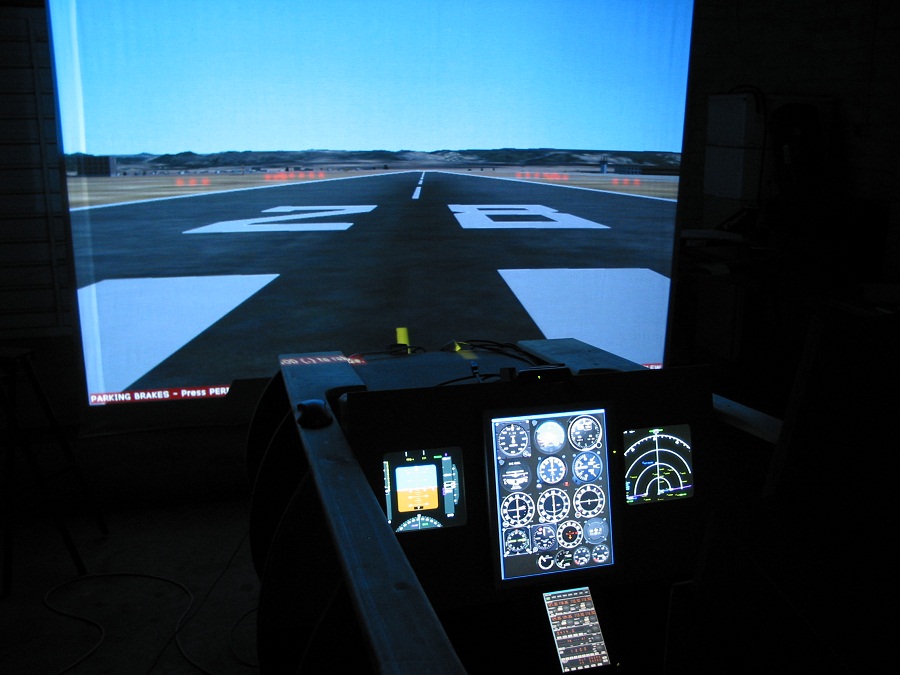
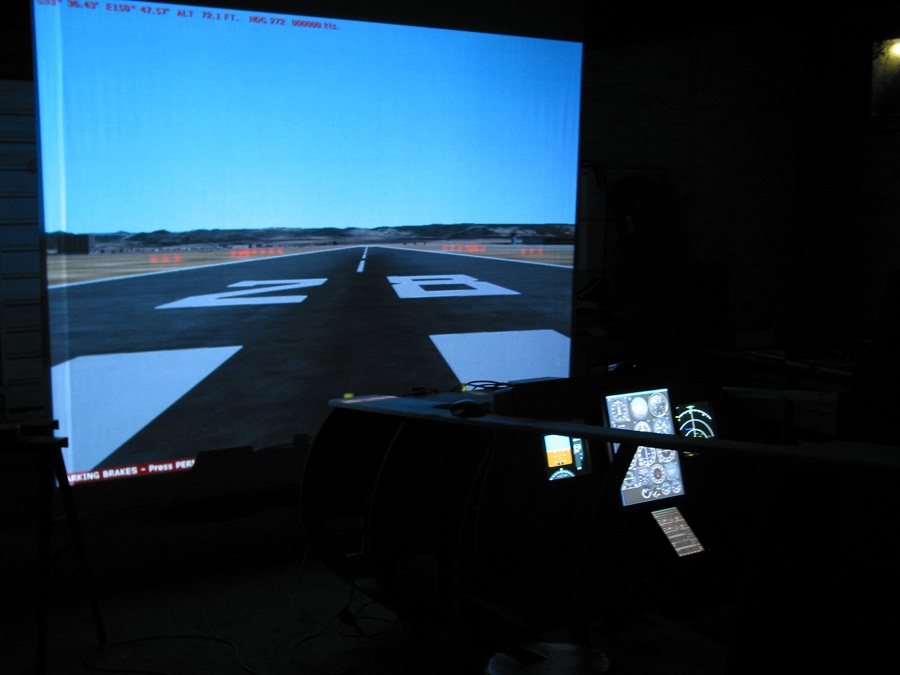
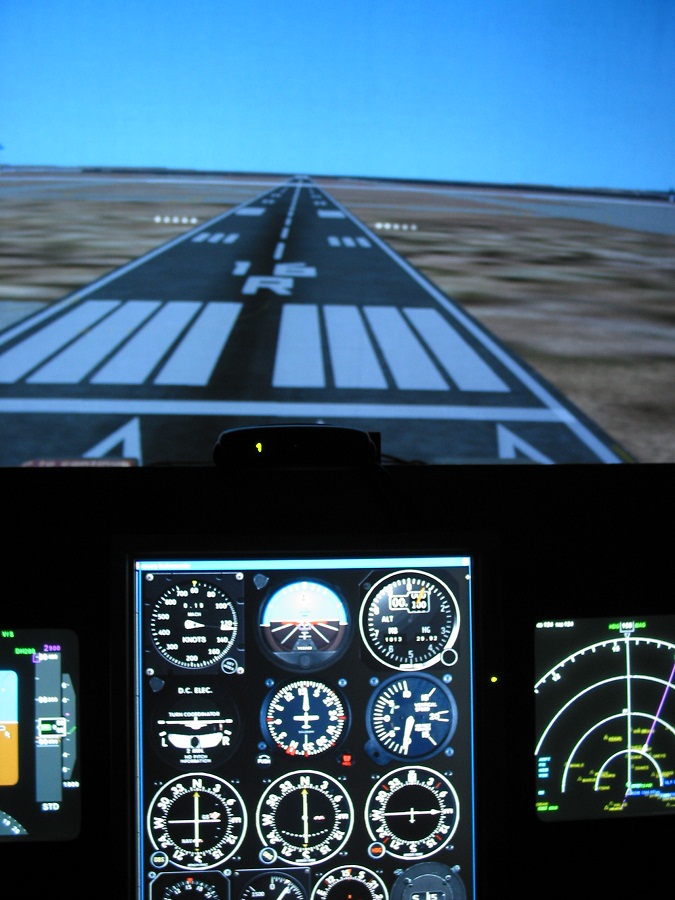
Some in action shots, sorry if some of them are little blurry, it's hard taking shots in the dark.
By The way the bright line down the left side of the projected image is from a seem that is sewn into the sheet, it is just a temporary setup & I will make a proper screen eventually, however I must say the white sheet does a pretty good job !!
-
05-24-2009, 02:33 AM #2625+ Posting Member
- Join Date
- May 2009
- Location
- Sydney, Australia
- Posts
- 47
Reconstructed Log
Posted: Fri Mar 11, 2005 1:19 am
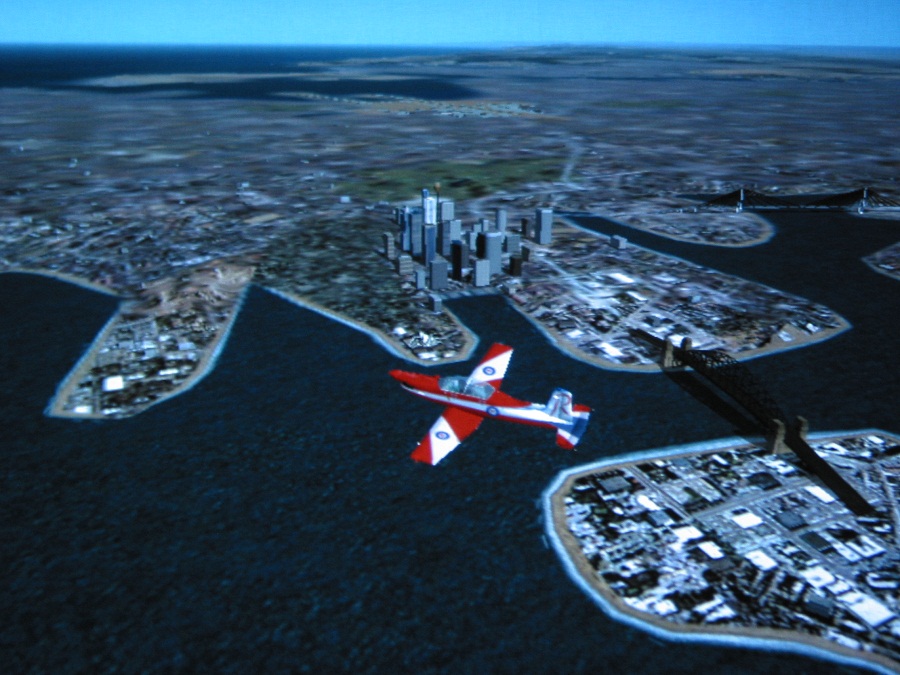
The model I am flight testing with is a PC-9 in the "Roulette" RAAF Aerobatic team colours, this model was designed by Dave Friswell from http://www.aussim.com.au/ a fantastic resource for australian aircraft for flightsim.
I had the honour of being one of the beta test pilots for this model & it is just a pure joy to zip around in.
All my online flight testing with VATSIM is done under the callsign TESTER with the numbers being the month & year of the flight test, that way I can tell when a flight test was carried out from my VATSIM pilot logs.
For example TESTER035 is Month 03 Year 2005.
Over Sydney Harbour.......
-
05-24-2009, 02:37 AM #2725+ Posting Member
- Join Date
- May 2009
- Location
- Sydney, Australia
- Posts
- 47
Reconstructed Log
Posted: Sun Apr 24, 2005 3:33 am
Well The Weather here in Sydney has been quite warm for this time of year & has allowed me to do some more work at night without freezing my *** off in the workshop.
So I decided it was time to do some laborious stuff that just has to be done like it or not..............I have pulled the system down now & preparing for painting, I purchased some undercoat today & the spray gun is ready to go.
Whilst running on the projector I had a friend of mine come over who has his unrestricted private pilots licence & is endorsed on the 172, he commented that the sim was actually better than the ones they have at the flying school & he could certainly utilise it for instrument training exercises, he also noted that he found himself lining up the sim housing with the centre line of the runway & other reference points on the horizon just like you would in a real aircraft............an interesting comment I thought.
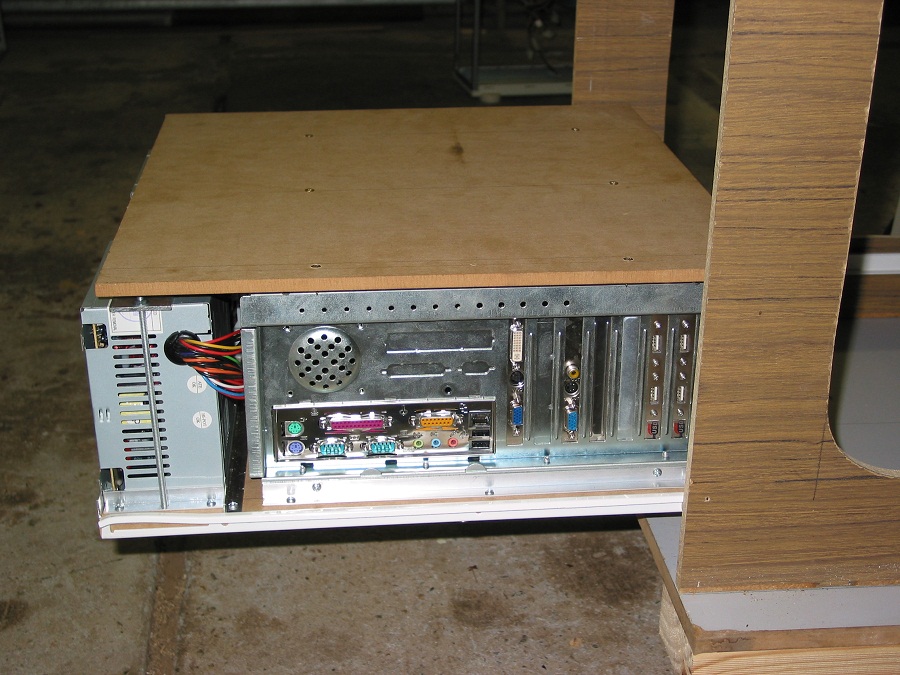
One subject I want to cover in detail in this photo shoot is the business end of the simulator, The "Engine Bay" if you Like..........I have not seen many people discuss this topic much when browsing through websites & forums, most of the talk usually concerntrates on Interfacing & panel/Display setups.
I can't help but wonder how many people build a great looking sim only to find they have nowhere to mount the PC's that are going to run the whole thing, On a 747 Flight deck with a First Officer Position available this can run into as many 6-8 Machines & If you want some wrap around views with Wideview it can stack up to even more.
I originally built my Sim to house about 3 ATX full size machines (2 at the front & 1 at the back) but realised later this would be a limiting factor.
On a Fighter pit such as the one I am building there is not a great deal of places to put machines so I have come up with a solution that will allow me to mount 6 Machines at the front & 2 at the rear if I wish.
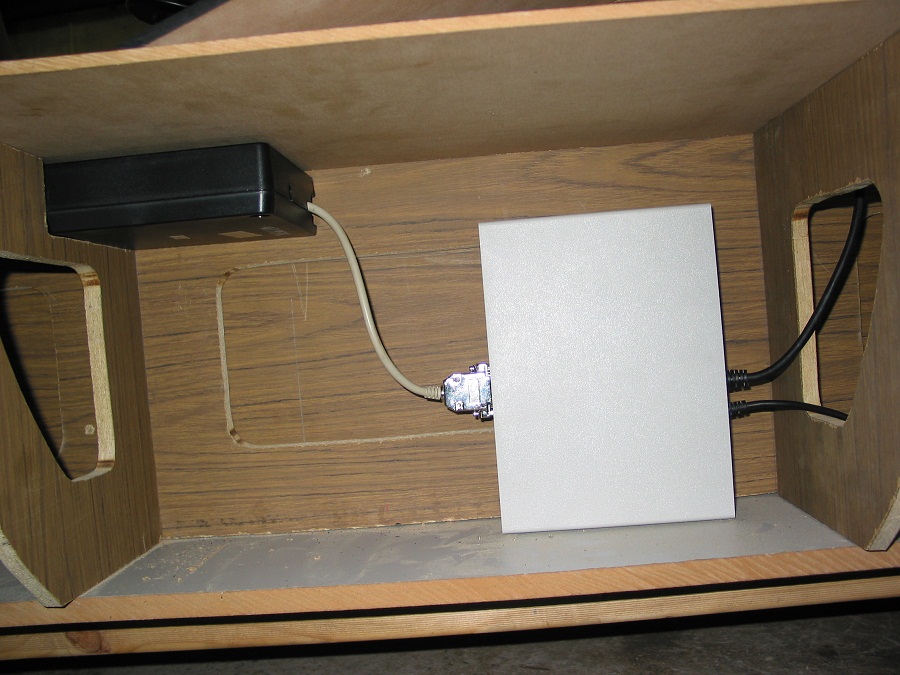
I have decided it is now time to start putting the foundations of the electronics into the system, Firstly custom fit the PC's as snug as I possibly can utilising all the room available.
Run an AC (240V) bus with powerboards allowing mains connection of equipments, Run a DC Bus 12V & maybe 5V around the sim allowing for lighting control & other ancilliary equipment that may require DC to operate & last but not least FSbus cabling.
With all these things in place it should give me the basic building blocks to then just move forward onto the finer details such as the panels & switches, that is why I have decided it is now time to do the painting, I don't want to have to unwire everything just to paint the chassis.
Something that came to my attention when setting up the sim in it's current state was access to the rear of the PC's, there are alot of cables running into the back of the machines & you need clear access to plug & unplug everything, You will always require to get to your machines for maintenance & upgrades, DO NOT OVERLOOK THIS FACT.
I am glad I have not rushed things because it helps for me to think about the way something is & review whether it has been done the best way.
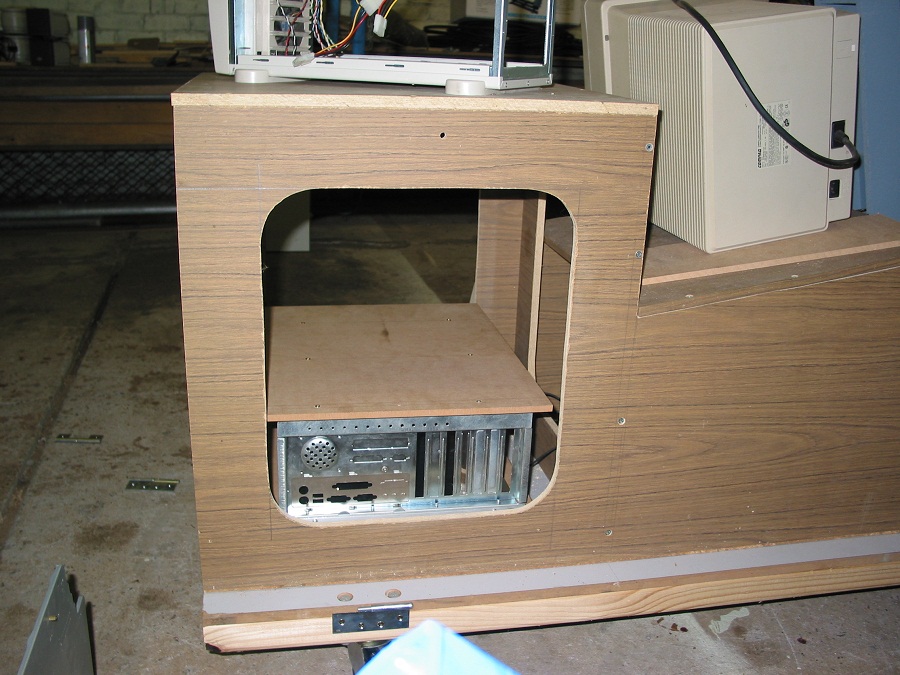
This was the case with the PC's so I have now mounted them in a totally different way than I originally planned.
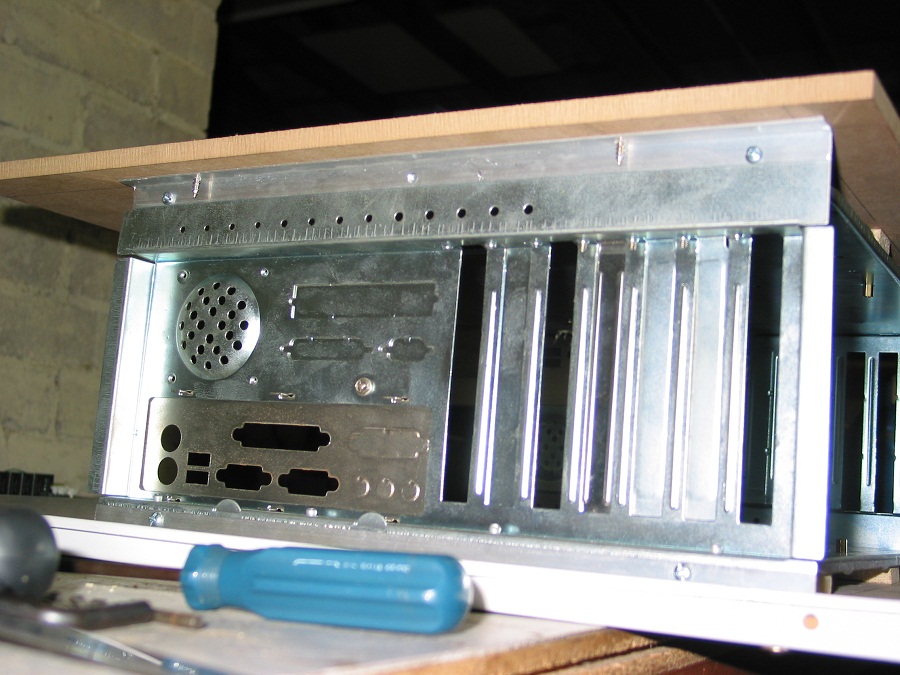
Here is the series of photo's, this setup allows for 2 full size ATX motherboards to be mounted in a space not much bigger than a micro ATX case.
Cheers Glenn.
-
05-24-2009, 03:55 AM #2825+ Posting Member
- Join Date
- May 2009
- Location
- Sydney, Australia
- Posts
- 47
Reconstructed Log
Posted: Sun Apr 24, 2005 3:58 am
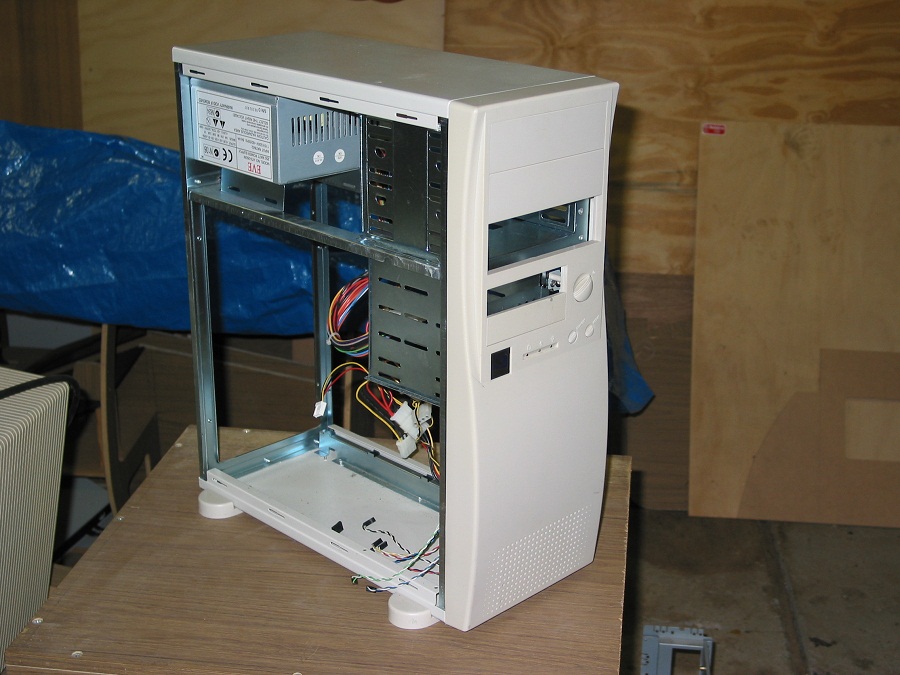
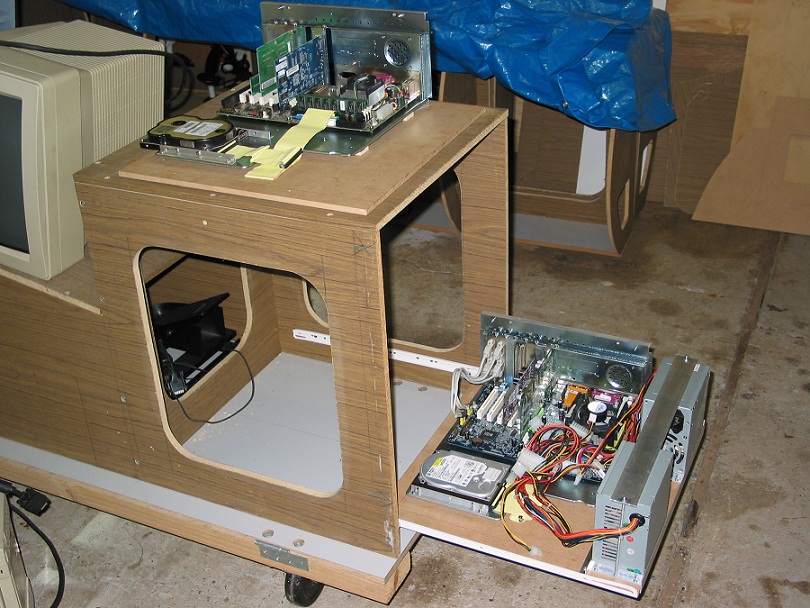
So what you need to find are some old ATX cases that are built with a removeable motherboard section, the paricular case that I have pictured above is one such case & was quite a popular model a few years ago.
The whole ATX section could be slid out by undoing 4 screws at the back of the case, Most of the cases I see these days are a completely single chassis.
So you might have to hunt around to find an old ATX case that you can do this with but there are still many out there in use I see them all the time.
It will make it easier if you can get them in pairs, as it keeps the mounting of the two boards square & symetrical, If you get 2 different type of cases you may have make adjustments to your mounting to correct for the different heights.
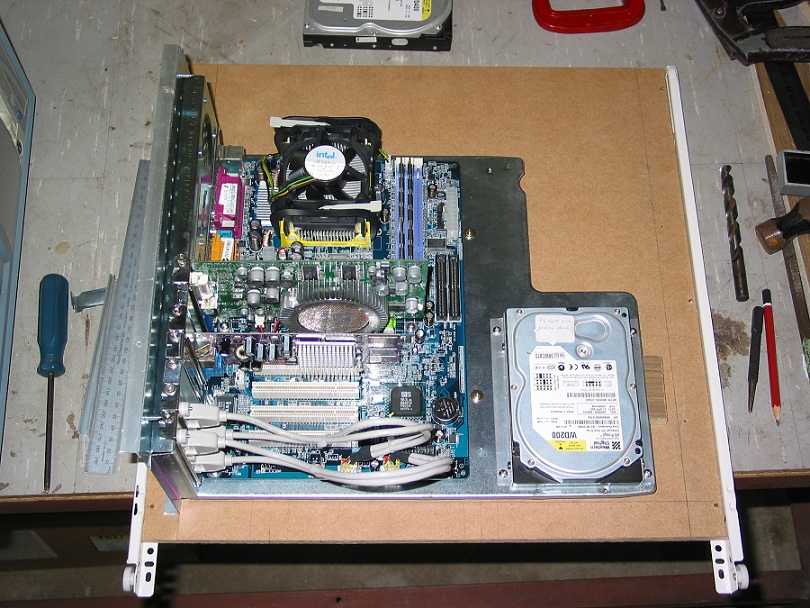
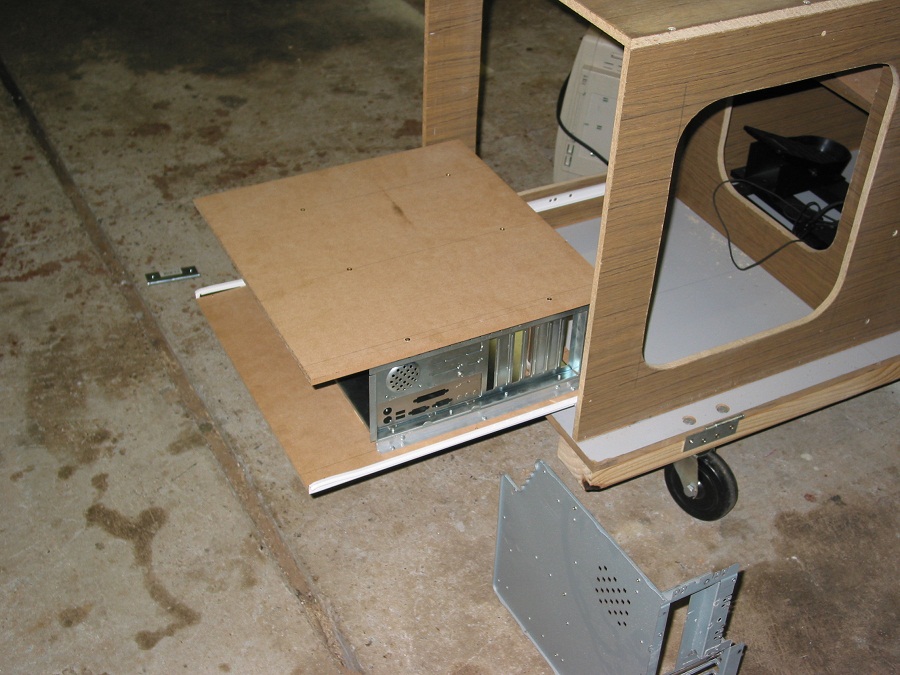
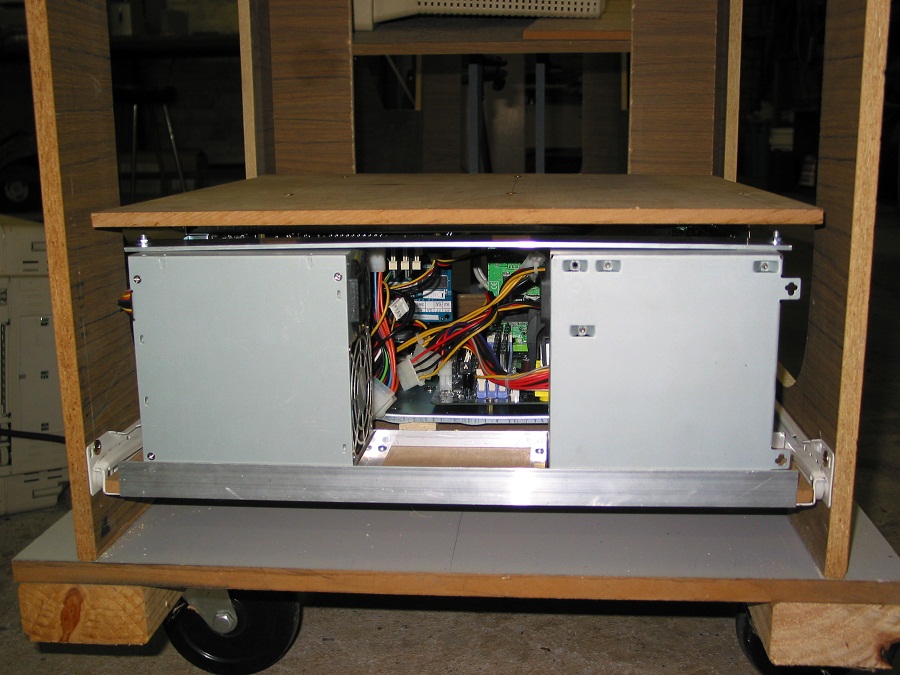
So I went & bought some drawer slide rails from the hardware & mounted a piece of MDF onto them that will slide into the front of the sim, on that board I have mounted the ATX section with some Aluminium angle & spacers to keep the metal chassis square to the board.
I then mounted a second metal chassis onto another piece of MDF in the same way, flipped it over & then attached the top one to the bottom one, again with aluminium angle.
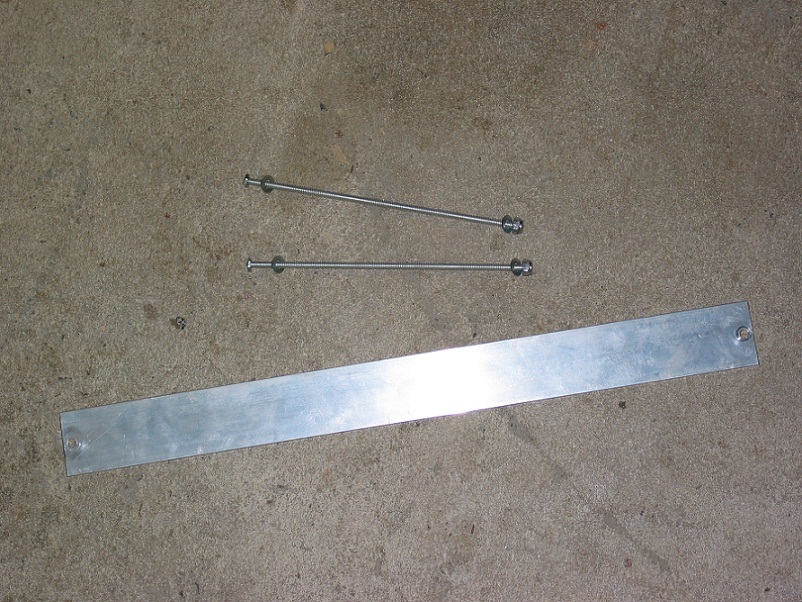
The Hard disk drives are also mounted to the metal chassis with aluminium angle, The power supplies for the two boards are mounted onto the bottom MDF board, positioned in place with angle & clamped down with threaded rod, similar to a car battery mount.
The pictures probably explain it better.
The assembly can be completely removed from the sim just like a normal cupboard drawer for maintenance reasons, the upper & lower boards seperate with the removal of 4 screws, no harder than opening a normal ATX case !!
Glenn.
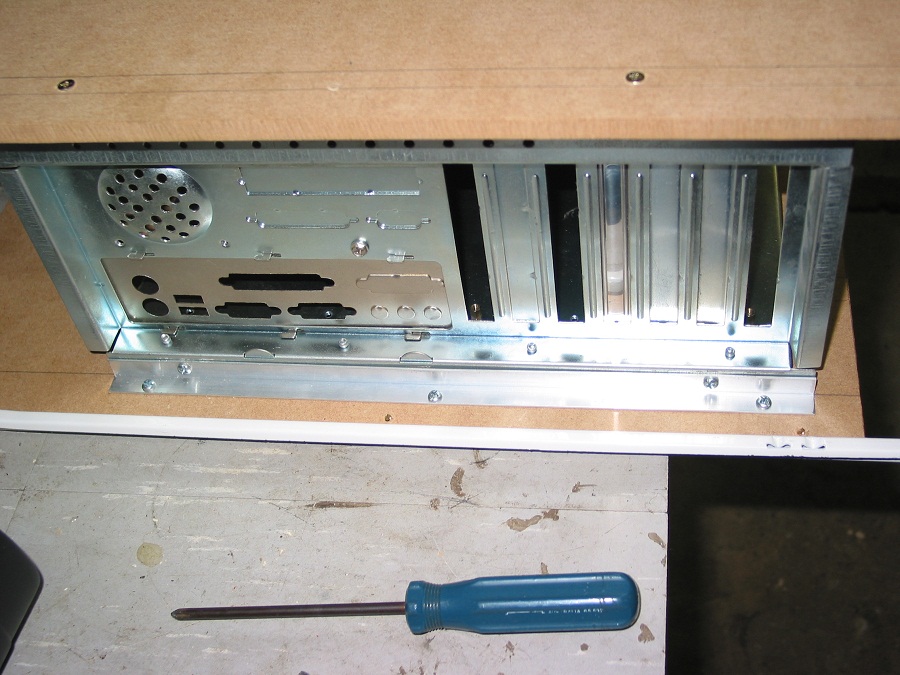
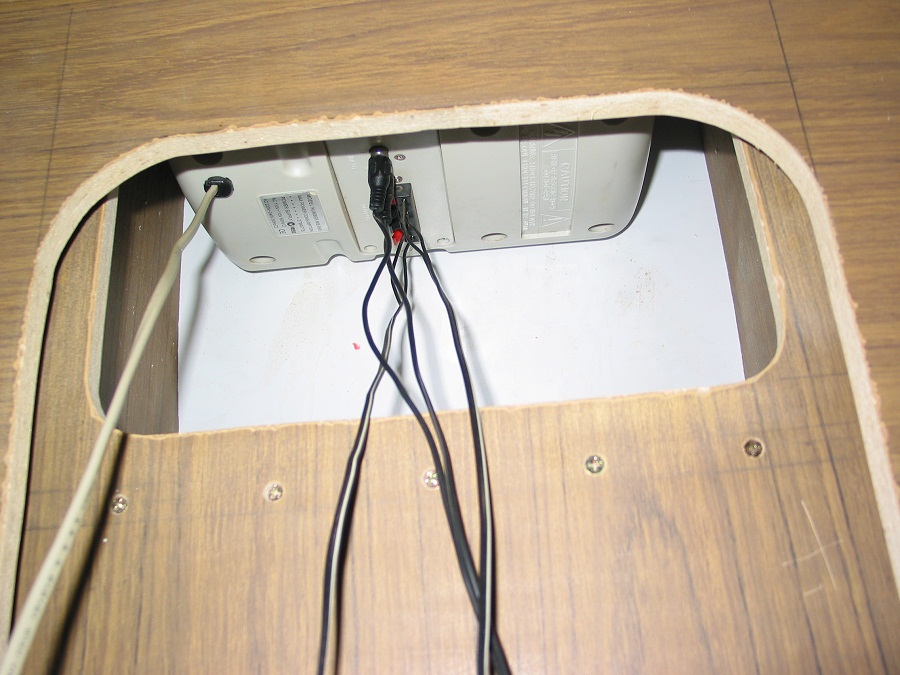
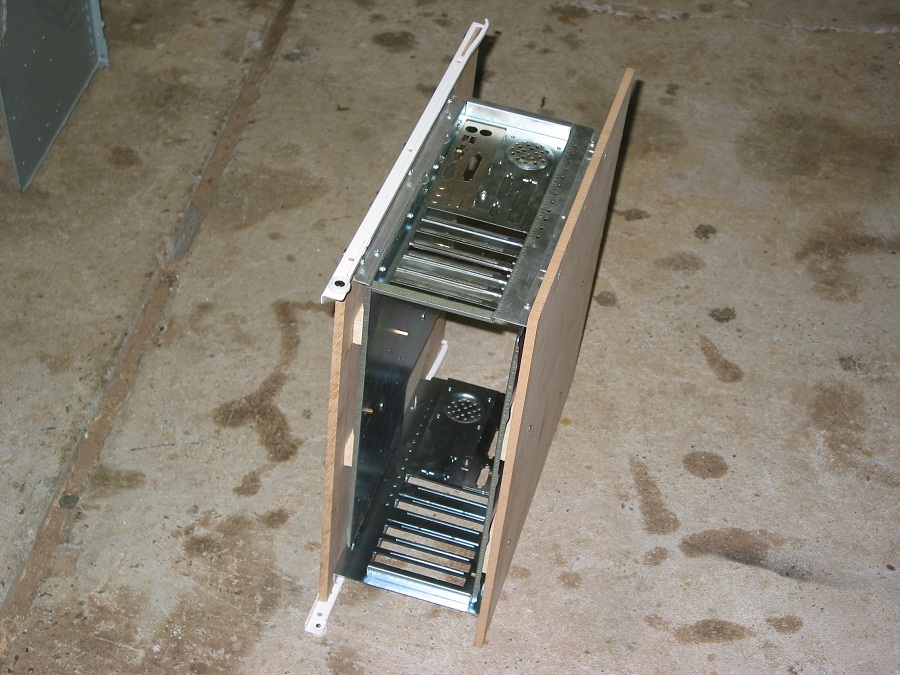
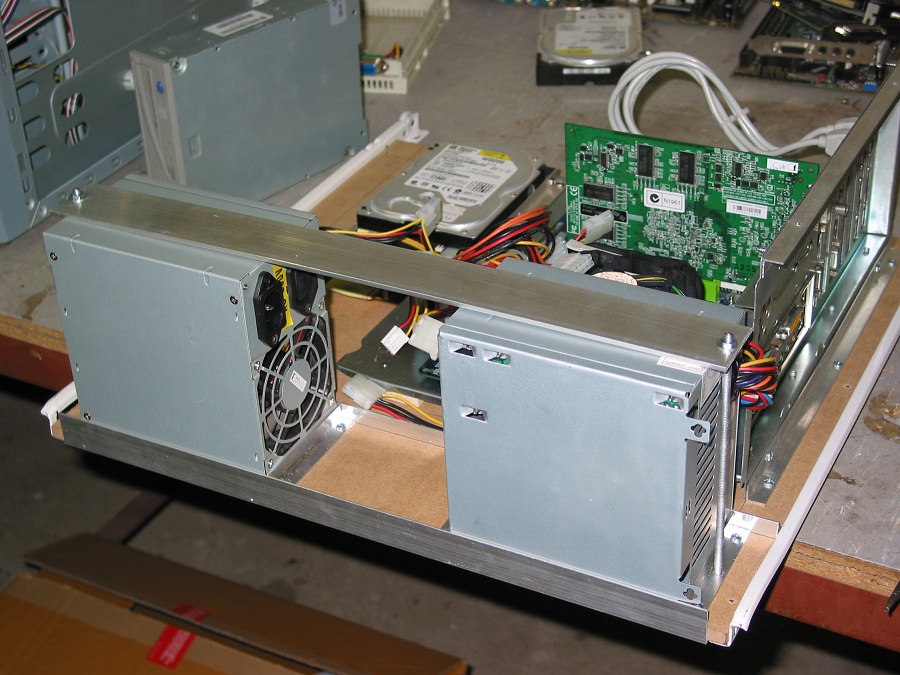
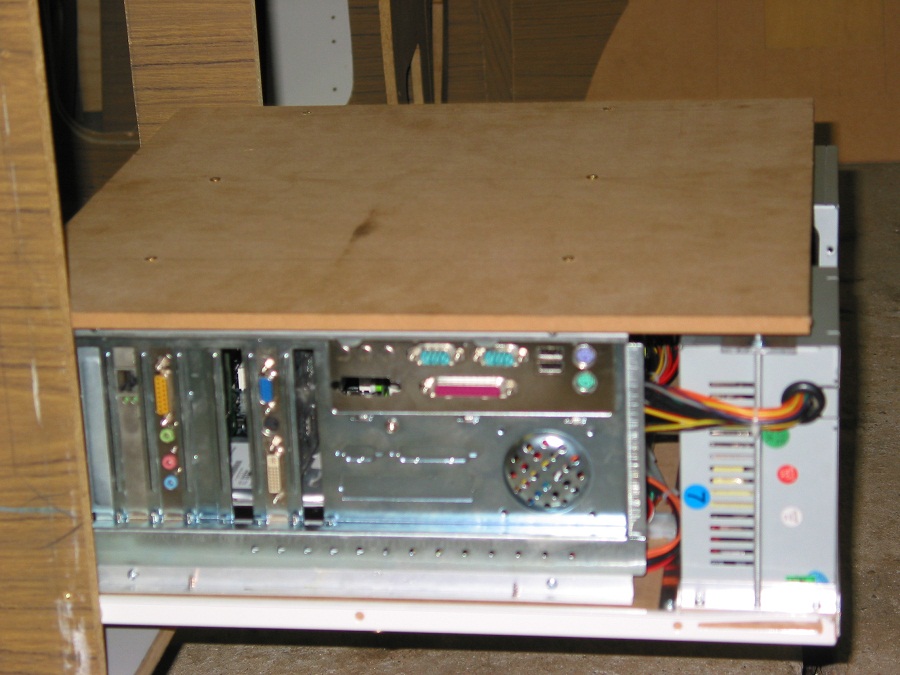
Notice accessibility to the rear of the PC's is now from the left & right of the sim, this will make connections to the box's so much easier, let me tell ya !
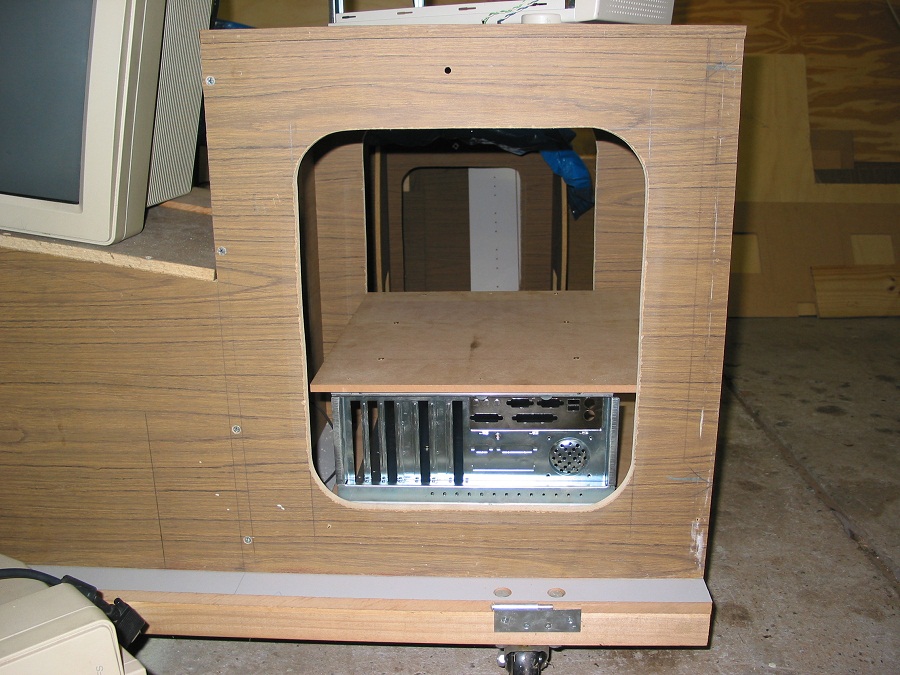
Notice I could mount another two drawers in this configuration if I really needed too but at the moment the sim will run OK with just these two machines.
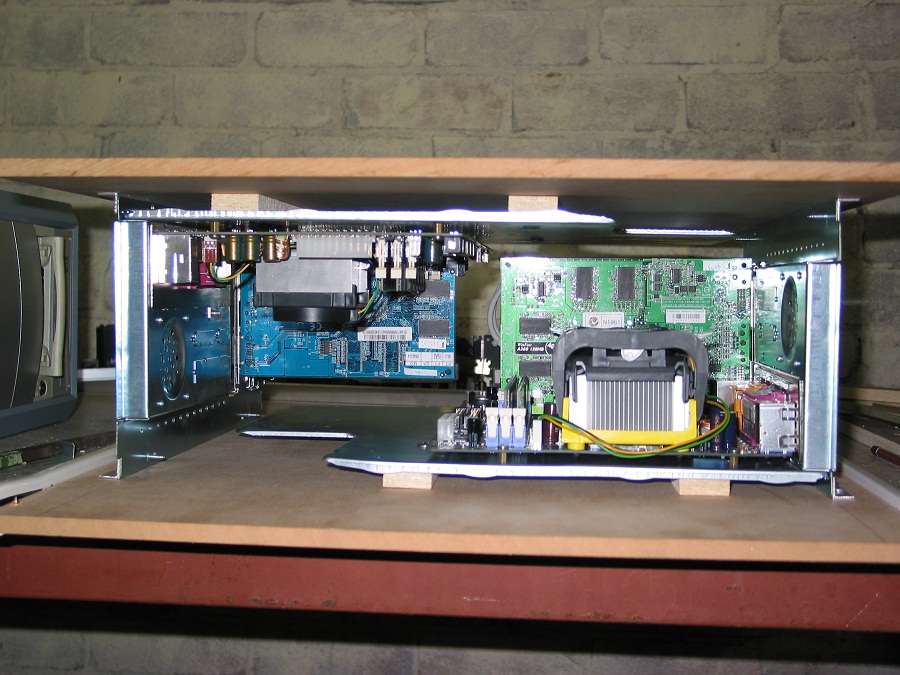
In these pictures you can see the setup of the power supply mounting using the aluminium angle.

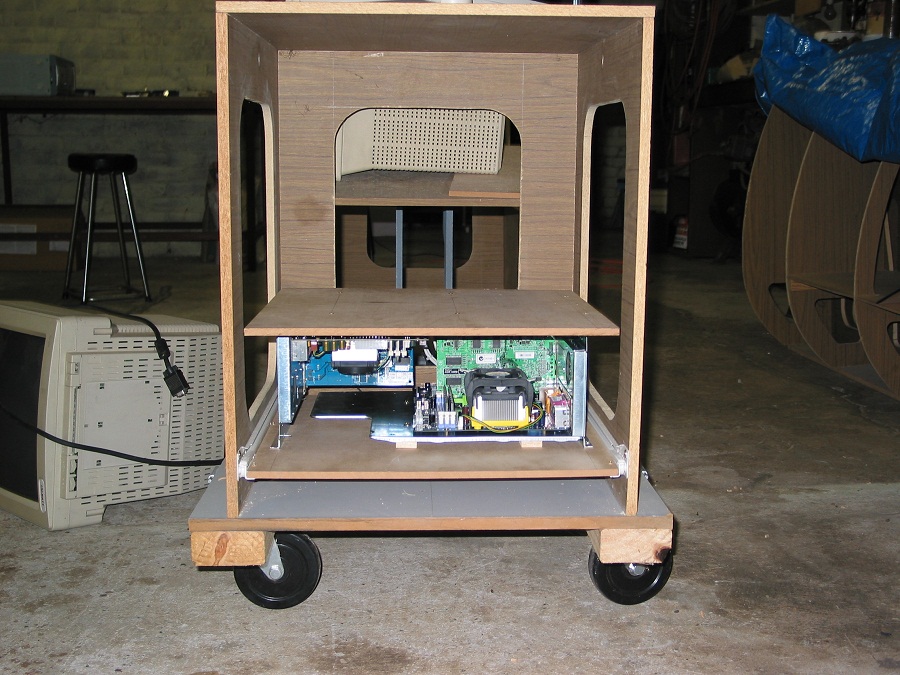
These last few shots now with everything mounted, by the way ventilation will be much better for the systems this way too as they won't be in an enclosed case, however I think I will need some fan's to get the air out of the sim once I start enclosing the whole thing.
Come to think of it the building of a simulator is just a big case mod really, we mod it so we are sitting in it rather than sitting in front of it.
Cheers Glenn.
-
05-24-2009, 04:09 AM #2925+ Posting Member
- Join Date
- May 2009
- Location
- Sydney, Australia
- Posts
- 47
Reconstructed Log
Posted: Tue Jun 14, 2005 12:31 am
Well it's the end of the Queen's birthday weekend & I have gotten stuck into the pit again...........about a month ago I started preparation for painting, I have sanded back most of the surfaces, quite time consuming & not much fun.
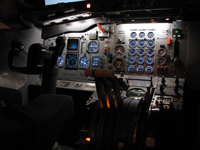
I have painted the left & right consoles & front panel, just with matt black.
As I mentioned earlier in this thread here are the pictures on the joystick Mods, you can also see the F22 digital upgrade chip fitted to the joystick board in the project box, as you can see the Joystick board had to be moved to the project box because I had to cut a chunk out of the joystick base to mount it the way I wanted.
On the stick itself you can see the grey 10mm conduit I used for the extension on the handle, I also heated it & bent it slightly for ergonomic reasons. I used a PS/2 plug & socket that fits just perfectly into the 10mm conduit so I can separate the stick from the base to allow fitting to the panel.
I planned to get into the painting this long weekend but I got sidetracked with what I would call a pretty good score, I ran into a guy who said he had a bunch of IBM 15" LCD monitors in his garage that had no stands or power packs with them, I decided it was worth checking out & went round to test them........Sure enough they were working fine, he only wanted $40 each for them so I jumped at the chance & grabbed them all, I even have a couple of extra ones for spares, but at this point they are all working.
These units are 1024x768 Native resolution, have an external power pack, i.e. they run on 12V DC & are a breeze to dismantle.
So I dropped the painting exercise for now & just had to get them mounted.
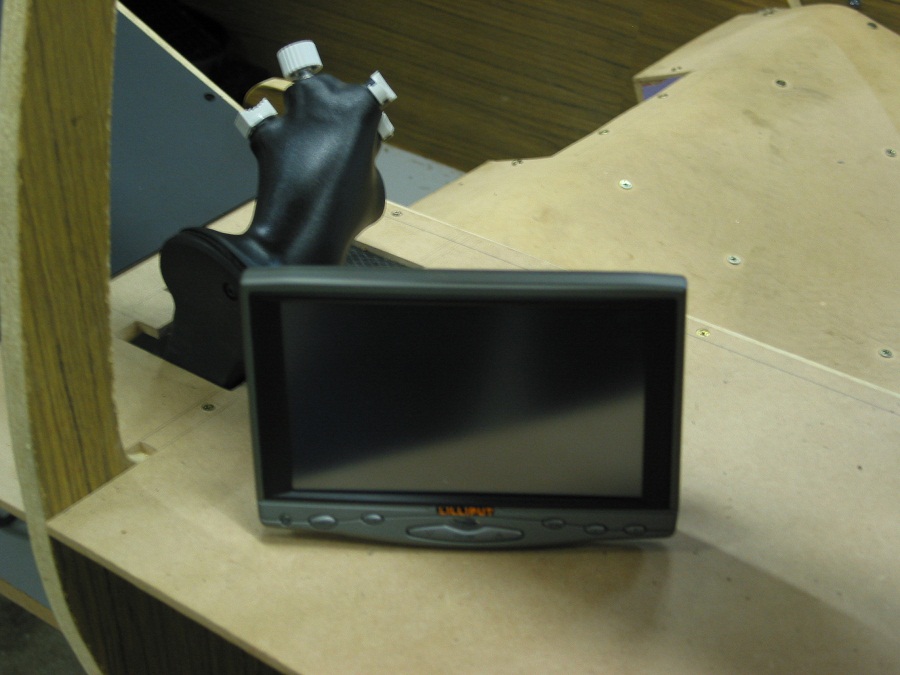
The difference between the LCD & a CRT is just unreal, as you can see from the pictures the nice flat screen behind the panel looks the part.
The CRT's had a bit of curvature & I could not get the the screens right up to the panel because of the shroud. I have not done an active test run in the sim with them yet because I have it pulled down at the moment.
I allways planned on using LCD's all the time, just not so soon. The difference in heat dissipation is fantastic too, those CRT's ran pretty hot & was allways bothering me when the glare shield was going to cover them up, thats one reason I have put it off until now.
Anyway it was just one of those lucky things being in the right place at the right time............I have been monitoring Ebay the last few months looking for good deals on LCD's but they are still quite a bit of money, particulary when you are after three of them in one hit.
Thats about it for now.............not too far from the paint work now, I just need some good weather over a weekend & I should have it done.
The garage is a mess at the moment as everything is pulled apart & of coarse I can't fly it either in this state, so plenty of reasons to get the painting out of the way.
Cheers Glenn.


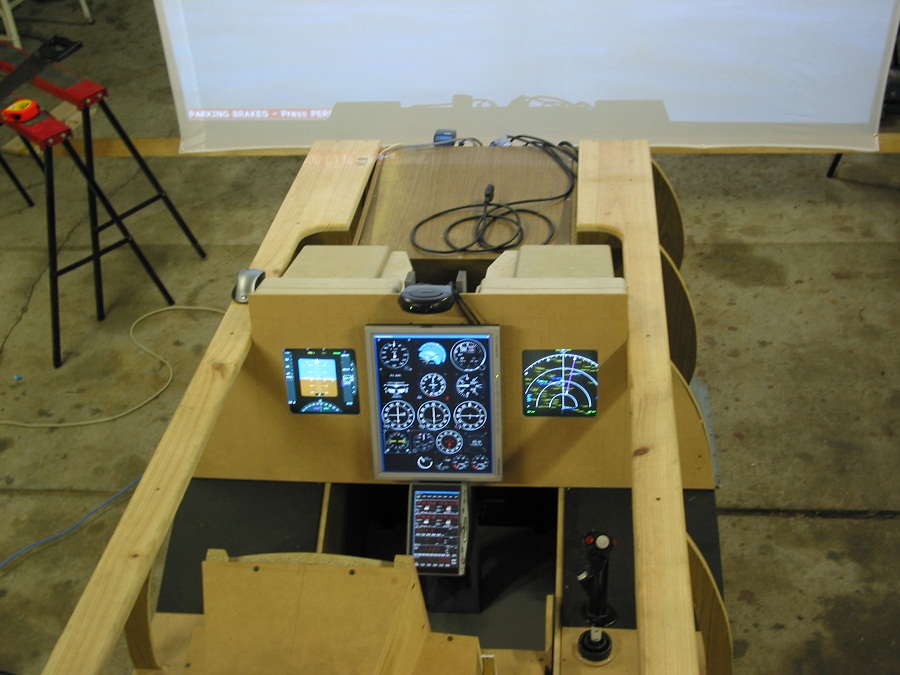
Here are the pictures in relation to the LCD screens, you will notice that I could not mount the whole three side by side............BAD PLANNING on my part, but I got around it by modifying the centre console & mounting the circuit boards for the centre monitor on the rear of the front panel.
The left & right screens are simply removed from the cream plastic housings & bolted on to the back of the front panel.......Just out of interest, the actual displays are produced by Samsung.
You may notice I finally got around to doing the leg cutouts in the front panel too, that has been bugging me for a while.


I just love the new profile, I guess the pit has just lost some weight too !!


-
05-24-2009, 05:47 AM #3025+ Posting Member
- Join Date
- May 2009
- Location
- Sydney, Australia
- Posts
- 47
Reconstructed Log
Posted: Sun Jun 19, 2005 11:23 pm
Well Painting is underway, lots of sanding, a few runs here & there, not a great deal of fun. It's a messy job & I did it outside so I had to wait for some good weather.
I have never really used a spraygun before so I just took it slowly. The secret seems to be spray it lightly, heavy spraying will result in runs.
I would spray an area lightly, then move onto another area allowing what I had just done to dry a little, then eventually come back to the original spot & do another light coat, keep going around like this & you eventually end up with a totally painted item.
It also seems that the thinning of the paint is important too, fairly thin but not too thin. I would suggest some experimentation before doing the actual job at hand.
I have got everything painted except the right console, still some sanding to be done on that one & then I will hit that with some paint too.
In the meantime here's how they came out.
Glenn.


did not paint the polycarbonate as I don't think the paint will stick, so I will probably leave it white, hopefully a nice cushion will cover that up anyway.
I will take some shots of the sub woofer placement in the seat once I have the painting completed, you can see it here masked with newspaper.


 Reply With Quote
Similar Threads
-
nice fighter video's
By flatlandpilot in forum Pilots Lounge - Let your Hair downReplies: 1Last Post: 09-18-2010, 10:56 AM -
Very nifty for fighter pilot sims..
By Geremy Britton in forum Cockpit Parts and Motion PlatformsReplies: 0Last Post: 02-16-2009, 01:24 PM -
Awesome fighter sim
By warvet in forum Pilots Lounge - Let your Hair downReplies: 3Last Post: 09-28-2008, 12:05 PM


Candid connections: Platform for casual relationships Live Women Prime Сasual Dating
Super Сasual Dating - Genuine...